
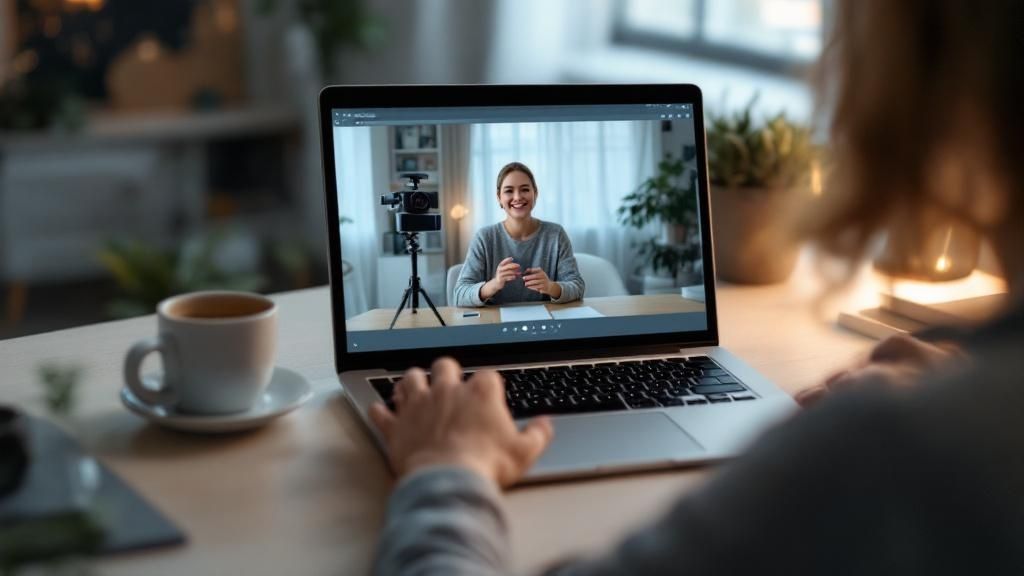
We’ve all been there. That pre-meeting dread, wondering if your camera or microphone will suddenly decide to stop working. The fastest way to get some peace of mind is to use a trusted online testing tool. It gives you immediate feedback without forcing you to dig around in confusing system settings. Think of it as your first-line check before any important video call, stream, or recording session.
Quickly Check Your Camera and Mic Before Any Call
Let's ditch that pre-call panic. Before you even think about diving into system settings or browser permissions, a simple online test gives you a quick "yes" or "no" on whether your hardware is even being detected. These web-based tools are built for one thing: to instantly tell you if your camera and microphone are alive and kicking.
I always start here myself because it cuts through all the software layers that can muddy the waters. The tool directly asks for access to your devices, then shows you a live video feed and a visual audio meter. If you can see your face and the little meter bounces when you talk, your hardware is good to go. It’s really that simple.
Why Start With an Online Test?
An online check is the most efficient first step for a few key reasons:
- Immediate Feedback: You get real-time visual and audio confirmation in seconds. No waiting.
- Simplicity: It helps you sidestep the maze of operating system menus and browser settings.
- Problem Isolation: This is a big one. It helps you figure out if the issue is with your hardware itself or just with a specific app like Zoom or Microsoft Teams.
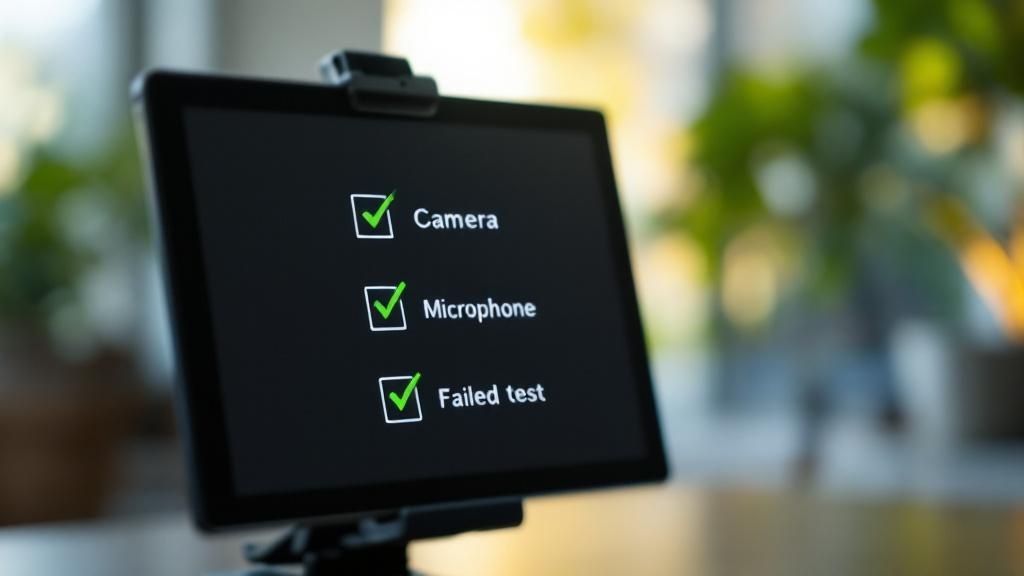
For example, a great free utility is Online Mic Test. It provides a super clear visual of your microphone's input, so there's no guesswork involved.
The screenshot above shows a line that moves up and down with sound. That’s your undeniable proof that the mic is picking up audio. If you see a flat line, you know you've got a problem to solve.
If something isn't working at this stage, it's time to play detective. I've put together a quick diagnostic table to help you pinpoint the most frequent issues, from simple permission blocks to pesky driver conflicts. This initial check saves you from that frantic, last-minute troubleshooting when you should be focusing on your meeting.
Common Reasons Your Camera or Mic Is Not Working
Here’s a quick rundown of the usual suspects when your tech goes silent.
| Problem Area | Common Cause | Quick Fix |
|---|---|---|
| Permissions | The browser blocked access to the camera or mic. | Click the lock icon in the URL bar and toggle the permissions to "Allow." |
| Hardware | The device is unplugged or not the selected default. | Make sure the USB is plugged in securely. Go to your system's sound/video settings and select the correct device. |
| Software Conflict | Another app (like Teams or Discord) is already using the device. | Close all other applications that might be using your camera or microphone. A full restart is a great way to ensure this. |
| Drivers | The device driver is outdated, missing, or corrupted. | Head to the Device Manager (on Windows) or System Information (on Mac) to check for and apply any driver updates. |
Running through this checklist after an online test will solve the problem 9 times out of 10. If you've tried these fixes and are still stuck, then it's time to move on to more in-depth troubleshooting within your operating system and browser.
Testing Your Hardware Within Your Operating System
So, an online tool couldn't find your camera or mic? The next logical step is to see if your computer's operating system (OS) can even see it. This is a crucial diagnostic step. If your OS can't detect the hardware, no browser or application ever will.
Let's dig into your system-level settings to figure out what's going on. We're going straight to the source to confirm your computer recognizes the device, has it set as the default, and has given it the right permissions. This is a super common issue, especially if you have multiple webcams or microphones plugged in, like a headset mic and the one built into your laptop.
Checking Your Gear on Windows
If you're on a Windows machine, this is pretty easy. Your first stop should always be the built-in Camera app. Just open your Start Menu and type "Camera." If it opens up and you see your own smiling face, you've confirmed the hardware itself is working on a system level.
For your microphone, you’ll want to check out the Sound settings.
- Right-click the little speaker icon in your taskbar and choose Sound settings.
- Look for the "Input" section. You'll see a dropdown menu there; make sure your preferred microphone is selected.
- Now, just talk. See that blue bar under "Test your microphone"? It should jump around as you speak. If it’s moving, Windows is hearing you loud and clear.
If that bar is stubbornly flat, double-check that the volume slider isn't all the way down or that the device isn't muted. Sometimes, the fix is as simple as picking a different device from that dropdown menu.
Verifying Hardware on macOS
On a Mac, the process is just as simple. The fastest way to test your camera and mic is by using the apps that come with the computer. For your camera, Photo Booth is your best friend.
Just open Finder, head to your Applications folder, and launch Photo Booth. If your webcam is alive and kicking, your image will pop right up on the screen. This is your proof that macOS sees the camera hardware.
The Big Picture: The whole point of an OS-level test is to narrow down the problem. If your camera and mic work perfectly fine in Photo Booth and your Sound preferences but not in your browser, the problem isn't your hardware—it's almost certainly a browser permission issue.
To check your microphone, you'll need to open up System Settings.
- Click the Apple menu in the corner and select System Settings.
- Choose Sound from the sidebar.
- From there, click the Input tab.
You'll see a list of every microphone connected to your Mac. Pick the one you want to test and say something. The "Input level" meter should light up and flicker, showing that it’s picking up sound.
Webcam technology is always getting better, which makes sense given how much we rely on them. The broader camera market was valued at around $16.7 billion in 2025 and is projected to climb to $25.8 billion by 2033. This boom is driven by our need for crystal-clear video in streaming and remote work, pushing manufacturers to add features like AI-powered autofocus and better image processing. You can learn more about the evolving digital camera market trends.
Here's a look at the macOS privacy settings for the camera, where you can give—or take away—access for specific apps.

Making sure the checkbox is ticked for the app you're trying to use is a make-or-break troubleshooting step. If an app is unchecked here, macOS will block it from using your camera, no matter what other settings you fiddle with.
Taming Browser Permissions and Settings
So, your camera and mic are working fine on your computer, but the moment you open a website, they suddenly play dead. Sound familiar? This is probably the single most common hurdle people face. It's not a hardware problem; it's a browser one.
Modern browsers like Chrome, Firefox, and Safari are designed with your privacy in mind, which is great. But it also means they act as strict gatekeepers, refusing to let any website access your devices without your explicit permission. We've all been there—jumping into an important video call only to find a black screen and a muted icon staring back. The good news is, the fix is usually just a few clicks away.
Where to Find Your Browser's Permission Dials
Every browser handles these permissions a little differently, but the core idea is universal. When a website wants to use your camera or mic, a small pop-up usually appears near the address bar, asking you to Allow or Block. If you’ve ever accidentally hit "Block," the browser will remember that choice, and that site won't be able to ask again.
If you need to undo that decision, here’s a quick map to the right settings:
- Google Chrome: Tap the three-dot menu, then head to Settings > Privacy and security > Site settings. You can manage Camera and Microphone permissions for all sites from here.
- Mozilla Firefox: Click the three-line "hamburger" menu and go to Settings > Privacy & Security. Scroll down to the "Permissions" area to find what you need.
- Apple Safari: This one is a bit different. With the specific website open, click Safari in the top menu bar, then Settings for [Website Name]. Here you can set camera and mic access to Ask, Deny, or Allow just for that site.
Getting these settings right is often the only thing standing between you and a smooth connection. For a more detailed walkthrough, especially for your microphone, our guide on how to enable your microphone has you covered.
Let's Walk Through a Real-World Example
Imagine you're trying a web-based recorder for the first time. You navigate to the site, and a prompt asks for camera access. If you grant it, you're golden. But if you mistakenly block it, the tool will simply say it can't find your camera.
Your first instinct might be to start unplugging cables or rebooting your computer. Don't. Your first move should always be to check the browser's permissions for that specific site.
Pro Tip: The fastest fix is almost always to click the little lock icon in the address bar, right next to the website’s URL. This shortcut menu lets you instantly toggle the Camera and Microphone permissions back to "Allow" for the site you're on.
What if You've Blocked It for Good?
Sometimes, in a moment of haste, you might have clicked "Block" and checked a box that said something like "remember this decision." Now, the site won't even ask for permission anymore. This is when you have to dive into the main browser settings menu we talked about earlier.
Just find the website in your "blocked" list and remove it. The next time you visit the page and try to test camera and mic, the browser will treat it like a first-time visit and prompt you for access again. Honestly, this one simple reset clears up the vast majority of browser-related hardware headaches.
Tackling Those Stubborn Audio and Video Problems
So, you’ve tried all the easy fixes, and you’re still talking to a black screen or shouting into a dead microphone. It’s frustrating, I know. When the basics don’t work, it’s time to roll up our sleeves and look a little deeper.
Often, these stubborn issues come from something happening under the hood—think outdated drivers, software squabbles, or even a recent OS update that threw a wrench in the works. It's the kind of thing that happens when you plug in a new webcam and your computer just… ignores it.
The first place I always check is the system's hardware management. Your computer needs a special piece of software called a driver to talk to your camera and mic. If that driver is out of date, corrupted, or just plain missing, your hardware won’t have a voice.
This simple graphic breaks down the core steps you need to follow, from digging into your settings all the way to seeing that live feedback.
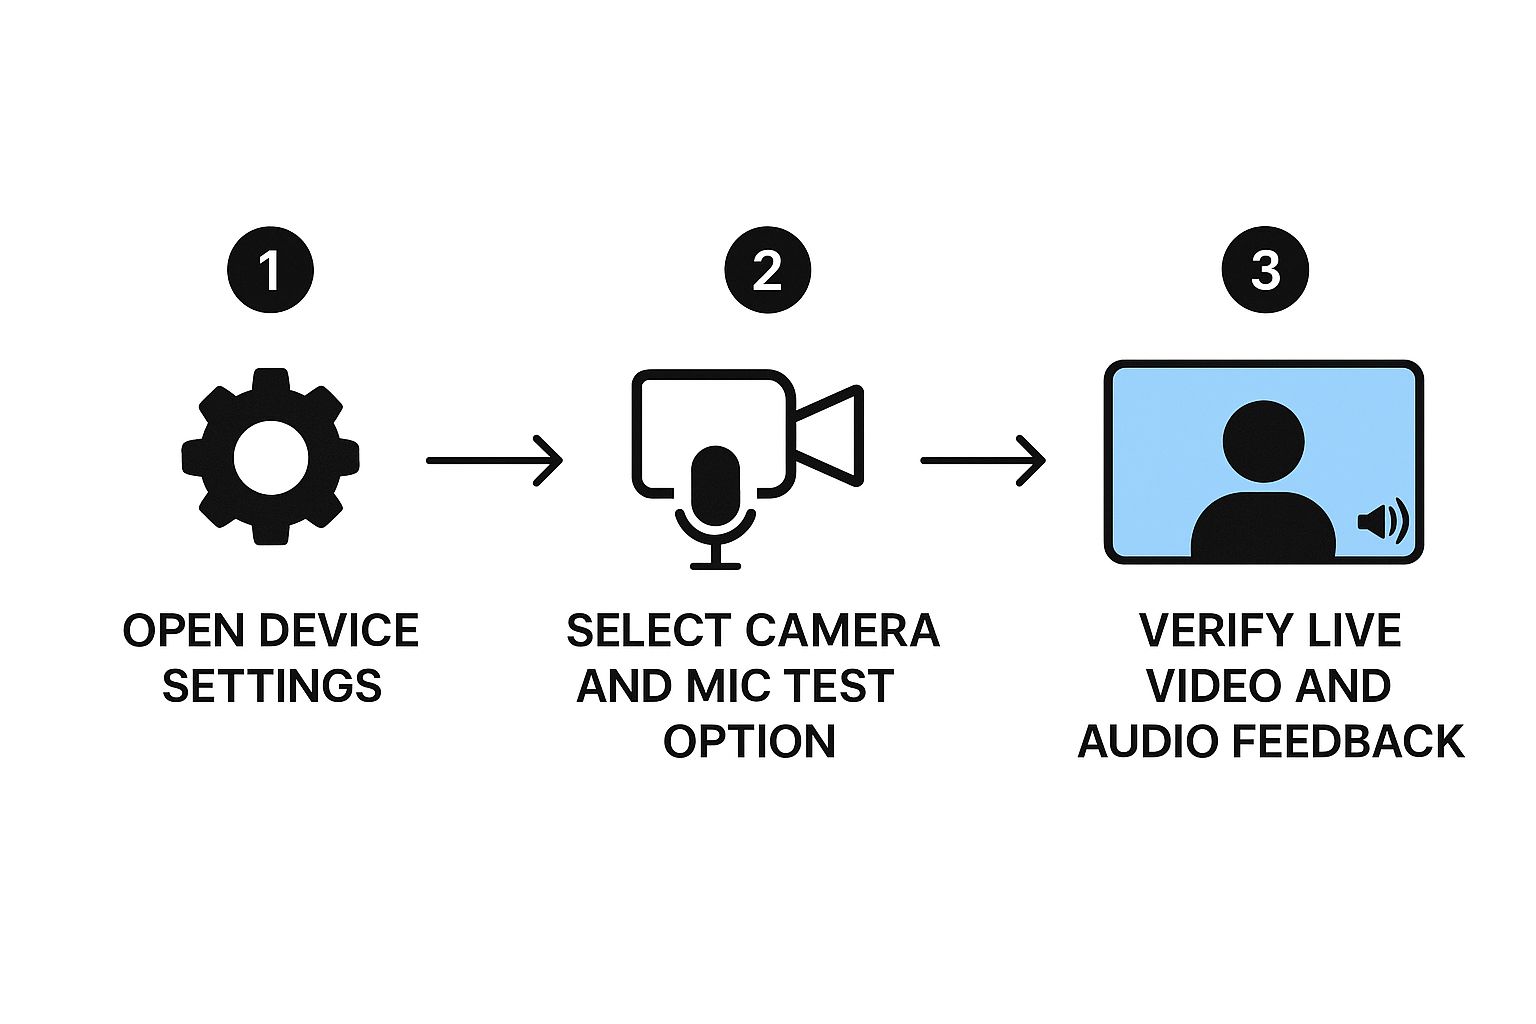
Ultimately, seeing that video feed and hearing your audio is the only way to know you’ve nailed it.
Hunting for Driver and Hardware Conflicts
For my fellow Windows users, the Device Manager is your best friend here. Just search for it in the Start Menu. Once it's open, expand the "Cameras" and "Sound, video and game controllers" sections. See a little yellow exclamation mark next to your device? That's a dead giveaway you've got a driver problem. A quick right-click and "Update driver" will usually get Windows to find a new one for you.
If you’re on a Mac, you can get a similar report card. Head to the Apple Menu > About This Mac > System Report. Under the "Hardware" category, look for "Camera" and "Audio." If your gear is listed and looks healthy, you're good. If it's not there at all, you might be looking at a bigger connection or hardware failure.
But sometimes, the driver isn't the culprit. Another app might be holding your hardware hostage.
I see this all the time: a video conferencing app like Teams or Zoom is still running quietly in the background. These programs can grab "exclusive" control of your camera, blocking any other website from using it.
Before you test camera and mic functionality, make sure you've completely quit any other video apps. Even your antivirus software can get a little too protective and block webcam access as a security measure, so it’s worth a peek in its settings.
I've put together a quick checklist to help you work through these problems logically, starting with the simplest fixes first.
Troubleshooting Checklist From Simple to Complex
This table walks you through a step-by-step process, so you're not jumping to complex solutions when a simple unplug-and-replug would have worked.
| Check | Action Required | OS/Platform |
|---|---|---|
| Physical Connections | Unplug and firmly reconnect the USB cable for your camera/mic. | All |
| Different Port | Try plugging the device into a different USB port on your computer. | All |
| Privacy Features | Check for a physical privacy shutter on the camera or a mute button on the headset/mic. | All |
| App Conflicts | Completely close other apps that use the camera (Zoom, Teams, Skype, etc.). | All |
| Browser Permissions | Re-check that you've allowed camera/mic access for the specific site in your browser settings. | All Browsers |
| Driver Updates | Use Device Manager (Windows) or check for system updates (macOS) to update hardware drivers. | Windows/macOS |
| Security Software | Temporarily disable any webcam protection features in your antivirus or security suite. | All |
Following this order has saved me countless headaches. It ensures you cover all your bases before assuming the worst.
Don't Overlook the Obvious Physical Checks
Before you dive deep into software settings, please—and I say this from personal experience—do the simple physical checks first. I can’t tell you how much time I've wasted on a "broken" microphone, only to discover the USB cable was just slightly loose. It's a humbling moment.
Here’s a quick rundown of what to check:
- Try a different USB port. Sometimes a single port goes bad or has its own quirky driver issues.
- Swap out the cable. For external devices, the cable is a common point of failure. If you have a spare, give it a try.
- Look for physical mute switches. Many webcams have a little slider to cover the lens, and headsets almost always have an in-line mute button. Double-check that they aren't on.
These small steps can save you a world of trouble. If you're responsible for helping others with their tech issues, our full https://blog.screendesk.io/technical-troubleshooting-guide/ offers more in-depth strategies. And if you're a consultee running into trouble, iKnowly has specific advice on how to troubleshoot video or audio issues for consultees.
Tips for Better Audio and Video Quality
Getting your hardware to show up is half the battle. But getting it to make you look and sound great? That's the real win. After running a quick test to make sure your camera and mic are actually working, a few simple tweaks can take you from looking grainy and sounding muffled to coming across crisp and professional.
The biggest secret to good video isn't your camera—it's your lighting. You don't need a fancy, expensive setup. Just be smart about the light you already have. The golden rule is simple: make sure your main light source is in front of you, not behind you.
If you sit with a bright window at your back, you’ll end up as a dark silhouette, looking like you're in witness protection. The fix is easy. Just turn your desk around to face the window. This one change costs nothing and instantly brightens your face, making your video feed dramatically clearer.
Fine-Tuning Your Audio and Video Setup
What lighting is to video, microphone placement is to audio. Getting that clear, rich sound is all about cutting down on echo and background noise.
Here are a few things I always recommend:
- Mind the Mic: Always try to position your microphone closer to your mouth than to your speakers. This is the single best way to prevent the mic from picking up its own output, which is what causes that awful echo.
- Go External: An external USB microphone is one of the best investments you can make. Even a budget-friendly one will be a huge step up from your laptop's built-in mic, capturing your voice with much more clarity and less room noise.
- Wipe Your Lens: It sounds almost too simple, but you'd be surprised how often a blurry image is just a smudged webcam lens. A quick wipe with a microfiber cloth can make a world of difference.
And if you're getting into more advanced audio uses, like dictation, having a clean signal is essential. The top voice-to-text software relies on good input to work its magic.
Key Takeaway: You can't just fix bad lighting or audio with an app. Getting the physical setup right—good light on your face and a mic near your mouth—solves 90% of your quality problems before the call even starts.
Let Software Do the Heavy Lifting
Once your physical space is sorted, it's time to dig into your software settings. Most video apps like Zoom and Microsoft Teams have some handy built-in tools. Dive into the settings and look for features like "Touch up my appearance" or background noise suppression.
These digital tools can smooth out your video feed and filter out annoying sounds like your dog barking or your aggressive typing. After you've got everything dialed in, I always suggest making a quick test recording. It's the only way to know for sure how you actually look and sound to others. If you want to get into the habit, our guide on video call recording has some great tips.
The push for better quality is a massive industry driver. In fact, the global digital camera market is projected to reach about $28.71 billion by 2025, thanks to demands for better image quality and new features. This trend is great news for all of us, as the technology in our webcams just keeps getting better. You can discover more insights about the digital camera market's growth on iConnect007.
Got Questions? We’ve Got Answers.
Even with the best plan, sometimes you run into a weird issue that just doesn't make sense. I've seen it all over the years. Here are a few of the most common head-scratchers people face when they test camera and mic setups, along with some quick, real-world solutions.
Why Does My Camera Work in One App but Not Another?
This is a classic. Nine times out of ten, it's either a permissions problem or what I call "camera hijacking." Certain apps, especially resource-heavy ones like Zoom or Microsoft Teams, can grab exclusive control of your camera, blocking anything else from using it.
Your first move should be to completely quit every other program that could possibly use the camera. Don’t just minimize them—go to your Task Manager or Activity Monitor and make sure they’re fully shut down. If that doesn't solve it, you'll need to dig into your system's privacy settings on both Windows and macOS to make sure the app you're trying to use has been given the green light.
How Can I Check if My Microphone Is Causing an Echo?
The easiest way to be sure is to simply record yourself speaking and play it back. You don't need any special software for this. The built-in tools on your computer—Voice Memos on a Mac or Voice Recorder on Windows—are perfect for the job.
Listen closely to the recording. If you hear a faint repetition of your own voice, you've got an echo. This usually happens when your microphone picks up the sound blasting from your own speakers.
The Quickest Fix: Honestly, the #1 way to kill an echo is to wear headphones. It's a simple step that creates a physical barrier, stopping your mic from hearing your speaker output and instantly breaking that feedback loop.
If you don't have headphones handy, try moving your microphone further from your speakers or just turning the speaker volume down a bit.
My Built-In Webcam Looks Terrible. What Can I Do?
You can't change the hardware, but you can definitely work some magic on the final image. Lighting is the most important factor, by a long shot. The key is to have the light source in front of you, lighting up your face, not behind you.
Something as simple as turning your desk to face a window instead of having your back to it can be a game-changer. Also, don't underestimate a dirty lens! Give it a quick, gentle wipe with a microfiber cloth. You'd be surprised how often a blurry picture is just a fingerprint smudge. For a guaranteed upgrade, though, a good external USB webcam will beat a built-in one every single time.
Can I Test My Camera and Mic on a Phone or Tablet?
Of course. The fastest check is to just open your phone's Camera app and record a quick video of yourself talking. When you play it back, you'll know in seconds if both the camera and mic are working as they should. It's a great little all-in-one test.
You can also use an online testing tool right from your mobile browser, which will ask for permissions just like it does on a desktop. Or, you can test directly inside apps you already use, like FaceTime, Google Meet, or WhatsApp, by simply starting a video call.
Ready to eliminate frustrating back-and-forth emails and solve customer issues faster? Screendesk provides your support team with powerful video tools like screen recording and live video chat, all within your existing helpdesk. Start simplifying your support process with Screendesk today.