
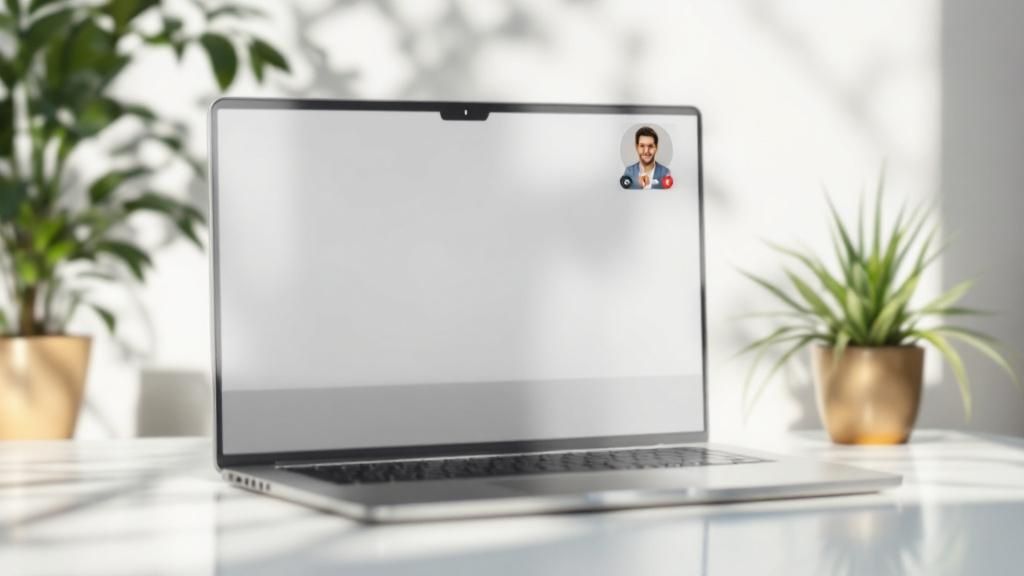
Let's be honest—trying to recall every single detail from a fast-paced video call is a losing battle. Important points get missed, key decisions become fuzzy, and action items can fall through the cracks. This is precisely why recording your video calls isn't just a neat feature anymore; for many teams, it's become a core strategic advantage.
Why Recording Video Calls Is Your Secret Weapon
The ability to capture and revisit meetings has quickly gone from a "nice-to-have" to a fundamental business need. You can see this shift in the numbers. The video conferencing market, which heavily relies on recording capabilities, ballooned to $7.45 billion in 2024 and is on track to hit $8.02 billion in 2025. This growth, detailed in global market reports, isn't just about new tech—it's about solving real-world collaboration problems.
Think about it from a practical standpoint. How many times have you hung up from a client call and immediately struggled to remember their exact feedback on a design mockup? A recording gives you an undeniable reference point, capturing every detail perfectly.
Transform Your Team’s Workflow
When you start building a library of recorded calls, you create a powerful, on-demand resource that can genuinely change how your team works.
Here’s how I’ve seen it make a difference:
- Create an Instant Training Library: We've recorded sessions with our top subject matter experts and repurposed them as onboarding material. It saves a ton of time and makes sure every new hire gets the same high-quality training.
- Capture Unfiltered Customer Feedback: Written notes can't capture a customer's tone, hesitation, or genuine excitement. Hearing it firsthand in a recording is gold for improving products and services.
- Clarify Ambiguous Project Details: When team members have conflicting memories of a decision made on a call, the recording becomes the single source of truth. It instantly clears up confusion and keeps projects moving forward.
By making recordings a standard practice, you create a system of record that supports accountability, improves clarity, and keeps everyone aligned without needing constant follow-up meetings.
Ultimately, recording video calls is about much more than just storing conversations. It’s a deliberate strategy to squeeze every bit of value out of your interactions. For teams using a tool like Screendesk, this process is baked right into their support workflow, turning routine calls into actionable assets that fuel productivity.
Getting Your Screendesk Settings Just Right
Before you even think about hitting that record button, taking a few minutes to get your settings dialed in is the secret to a great recording. I can't tell you how many times I've seen people lose a crucial meeting recording to a simple mistake like picking the wrong microphone.
Getting this initial setup right means you’re in control. You decide what gets recorded, how it looks, and how it sounds. This way, the final video is exactly what you need, whether it's for training a new hire or sending a recap to a client.
Here’s a quick look at the Screendesk dashboard where all the magic happens.
As you can see, everything is laid out logically. You can jump right into a new recording or find old ones without digging through confusing menus. This simplicity is what makes it easy to integrate video recording into your daily routine.
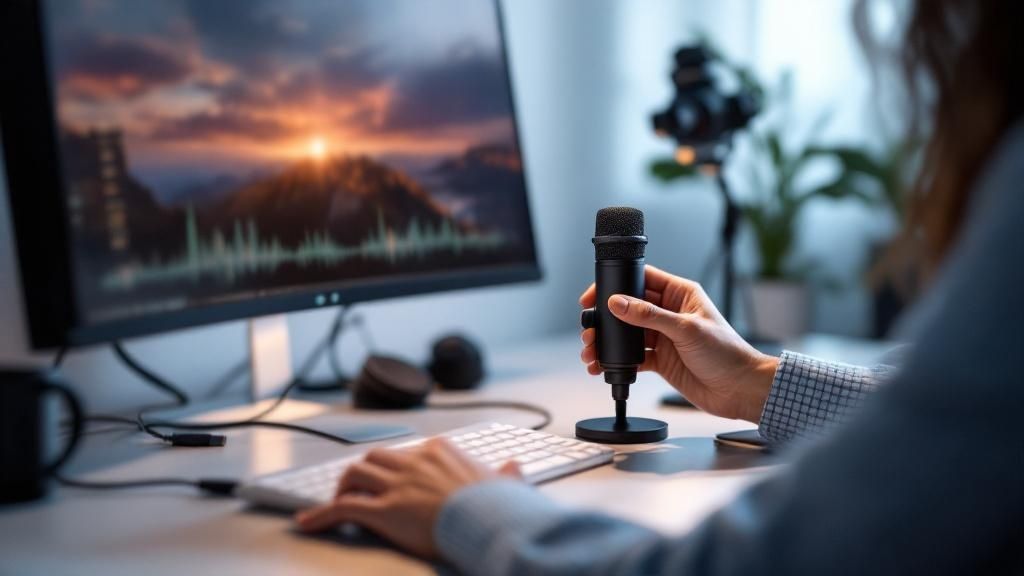
Nailing Your Audio and Video Sources
Let's be honest: if the audio is bad, the recording is useless. Muffled voices or missing audio from the other person on the call can derail the whole point of recording in the first place. Thankfully, Screendesk gives you fine-tuned control here.
- Your Microphone: If you have an external mic—even a basic headset—use it. Your laptop's built-in microphone will pick up every keyboard tap and echo in the room. Selecting your dedicated mic is probably the single biggest improvement you can make to your audio quality.
- System Audio: This is the key to capturing what everyone else is saying on the call. You absolutely need this turned on to record the audio coming from your computer. It's how you get both sides of the conversation.
The same logic applies to your video. You’ll want to pick your primary webcam and, just as importantly, decide what part of your screen you’re actually going to record.
Defining Your Recording Area
Want to look like a pro? Record only the application window, not your entire messy desktop. Nothing screams "unprofessional" like a Slack notification or a personal email popping up mid-recording. It's distracting for the viewer and can be a bit embarrassing for you.
Screendesk lets you zero in on a specific window, like your Google Meet or Zoom call. For instance, if you're on a client call in your browser, you can tell Screendesk to record only that specific browser tab. This keeps your other work private and your recording clean.
My biggest tip: Always record a specific window or a selected area. It protects your privacy, eliminates distractions, and gives you a polished video that’s ready to share without needing a bunch of edits later.
Finally, you'll need to think about quality versus file size. Recording in 4K looks amazing, but the files are massive and can be a real pain to upload or share. For most situations, a resolution of 720p or 1080p hits the sweet spot. It's perfectly clear for viewing on a computer screen but creates a much more manageable file.
Choosing the right settings from the start is what separates a frustrating experience from a flawless one. It’s worth the extra minute.
Screendesk Recording Settings Explained
To make things even clearer, I've put together this quick-reference table. It breaks down the key settings so you can find the perfect balance between quality and file size for whatever you're recording.
| Setting | Recommendation for High Quality | Recommendation for Smaller File Size | Best For |
|---|---|---|---|
| Resolution | 1080p or 4K | 720p | High Quality: Demos, tutorials, client-facing content. Smaller Size: Internal meetings, quick updates, personal notes. |
| Frame Rate (FPS) | 30 FPS | 15 FPS | High Quality: Capturing smooth motion or video playback. Smaller Size: Recording static screens or simple conversations. |
| Audio Bitrate | 256 kbps | 128 kbps | High Quality: Interviews, podcasts, any audio-critical recording. Smaller Size: Standard team calls where vocal clarity is good enough. |
| Recording Area | Specific Application/Window | Specific Application/Window | Both: This is a best practice for all recordings to maintain privacy and focus. Avoid recording your full screen unless necessary. |
This table should help you quickly decide on a setup. For a high-stakes client presentation, you might go for 1080p and 30 FPS. But for a quick internal team sync, 720p at 15 FPS is more than enough and will save you a ton of space. It's all about matching the settings to the job at hand.
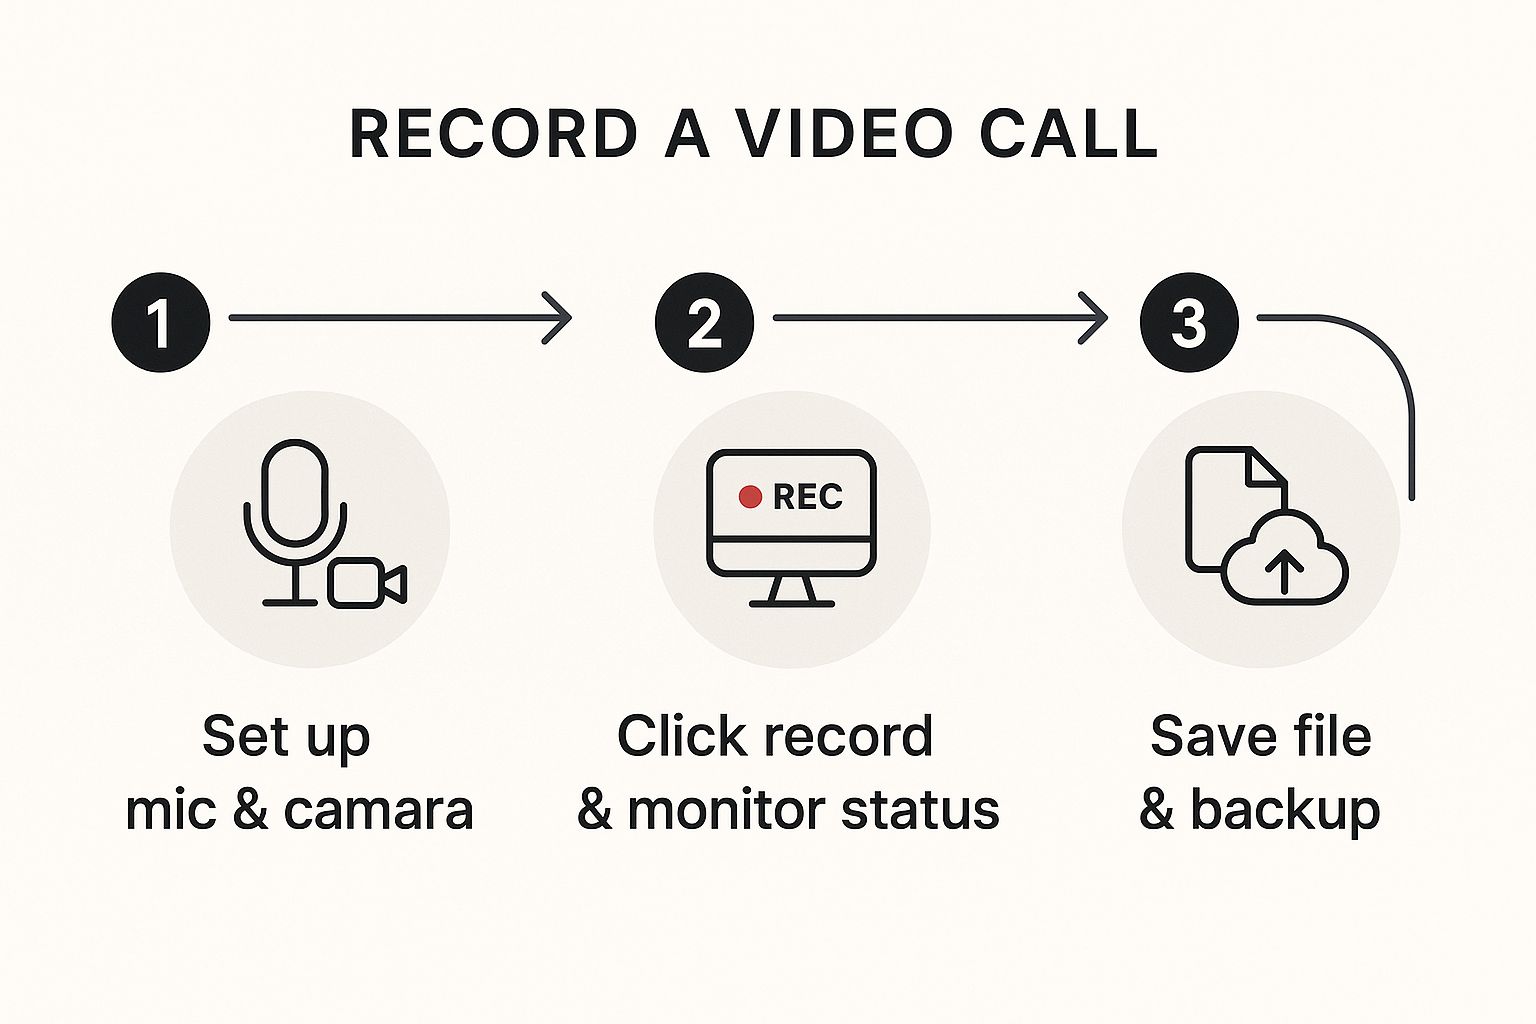
Running Your First Recording Session
Alright, you’ve got your settings dialed in and you're ready to start recording. It's totally normal to feel a bit antsy the first couple of times you do this, but trust me, it quickly becomes second nature. Think of it less as a big technical hurdle and more like a quick pre-flight check you do before takeoff.
Before the call officially kicks off, give yourself 30 seconds to run through a quick mental checklist. First, glance at your audio settings. Is your good external mic selected, or is it defaulting to the tinny laptop one? We've all been there. Next, confirm you're recording the right window—just the call itself, not your entire messy desktop with a dozen notifications popping up.
Here’s the most important tip I can give you: always, always run a quick 10-second test recording. This one simple habit will save you from so much frustration later. Just hit record, say a few words, and stop. Play it back to make sure your voice is coming through clearly.
Navigating the Live Call
Once you're in the middle of a call, the last thing you want to do is break the flow of conversation by fumbling with your mouse to find the record button. The goal is to make the recording process invisible. This is where keyboard shortcuts become your best friend.
Instead of clicking around, you can set up your own hotkeys right inside Screendesk. I'd recommend setting up a few key commands:
- Start Recording: A simple combo like
Ctrl + Alt + Rcan kick things off without anyone noticing. - Pause/Resume Recording: This is a lifesaver when the conversation goes off-topic or there's a short break you don't need to capture.
- Stop Recording: A final, clean way to end the recording right when the meeting wraps up.
Using shortcuts keeps your focus where it belongs: on the people in the call, not on the software running in the background. It turns recording into a simple, non-disruptive part of your workflow.
As the image shows, a great recording isn't about complex tech—it's about having a simple, solid process from start to finish.
After the Call Ends
The moment you hit stop, Screendesk gets to work processing your video. You’ll find the finished file waiting for you in the folder you chose during setup. The very first thing you should do is give it a quick spot-check. Just skim through it to make sure the audio sounds good and the video is smooth.
Next, and this is crucial, rename the file immediately. A month from now, a file named recording_001.mp4 will be completely meaningless. A clear, consistent naming convention like ClientName-ProjectUpdate-YYYY-MM-DD.mp4 makes your library searchable and genuinely useful.
A well-organized library of recordings is a powerful asset. Poorly named files create a digital junk drawer that no one will ever use. Take the ten extra seconds to label it properly.
Once it's checked and named, you’re ready to share it or archive it. If you want to explore more tips and tricks, be sure to read our complete guide on how to record a video call, where we cover everything from the basics to more advanced techniques.
Creating Professional-Quality Call Recordings
It’s one thing to just hit the record button. It’s another thing entirely to create a video that’s actually professional, useful, and something you can share with confidence. The difference really comes down to the small details. Luckily, a few simple best practices can transform a clunky, raw recording into a genuinely valuable resource.
Think about it: the quality of your recording has a direct impact on whether anyone will actually watch it, let alone understand it. Clear audio and clean visuals are non-negotiable. This is a big reason why the global market for call recording tools is expected to grow at a CAGR of around 15% between 2023 and 2028. As remote work becomes the norm, high-quality recordings are becoming absolutely essential for businesses everywhere.
Master Your Audio and Visuals
Let's start with the absolute foundation of any good recording: crystal-clear audio. Before you even think about the content of your call, you need to remind everyone of some basic microphone etiquette. This alone is a total game-changer.
- Use a Headset or External Mic: This is the single most important tip. It's a must for the host and strongly encouraged for everyone else. It isolates your voice and slashes background noise.
- Mute When Not Speaking: This simple habit prevents those distracting, accidental interruptions from coughs, loud typing, or a dog barking in the next room.
- Find a Quiet Space: Ask participants to join from somewhere with minimal distractions. A quiet room always beats a busy coffee shop or a noisy open-plan office.
Of course, what people see matters just as much. A messy, cluttered background can completely derail the focus of the conversation. Encourage your team to use a simple, neutral background or a professional-looking virtual one. You don't need a fancy studio setup for lighting, either. A simple lamp placed in front of you can eliminate harsh shadows and make a huge difference.
Steer the Conversation for a Focused Recording
Have you ever tried to watch a recording of a meeting that went completely off the rails? It’s not very helpful. As the host, it's your job to gently guide the discussion to ensure the final video is focused, concise, and gets straight to the point.
Kick off the meeting by clearly stating the agenda and what you aim to achieve with the call. This sets the right expectations from the get-go. If you feel the conversation drifting, you can politely steer it back. Try saying something like, “That’s a great point. To make sure our recording stays on track, let’s circle back to…” This simple act keeps the content tight and valuable for anyone who needs to watch it later.
Key Takeaway: A truly professional recording is intentional. You have to be more of a proactive director than a passive observer. By actively managing the audio, visuals, and flow of conversation, you ensure the final product is a polished and useful asset.
If you're looking for more tips, our guide on https://blog.screendesk.io/video-call-recording/ goes into even greater detail.
Smart File Management After the Call
Your work isn't done just because you hit the "stop" button. A fantastic recording can become totally useless if nobody can find it. It's time to ditch generic file names like meeting_recording.mp4.
Instead, come up with a simple and consistent naming system that your whole team can use. Something like ProjectName_Topic_YYYY-MM-DD.mp4 works wonders. This structure makes your files instantly searchable and easy to understand at a glance.
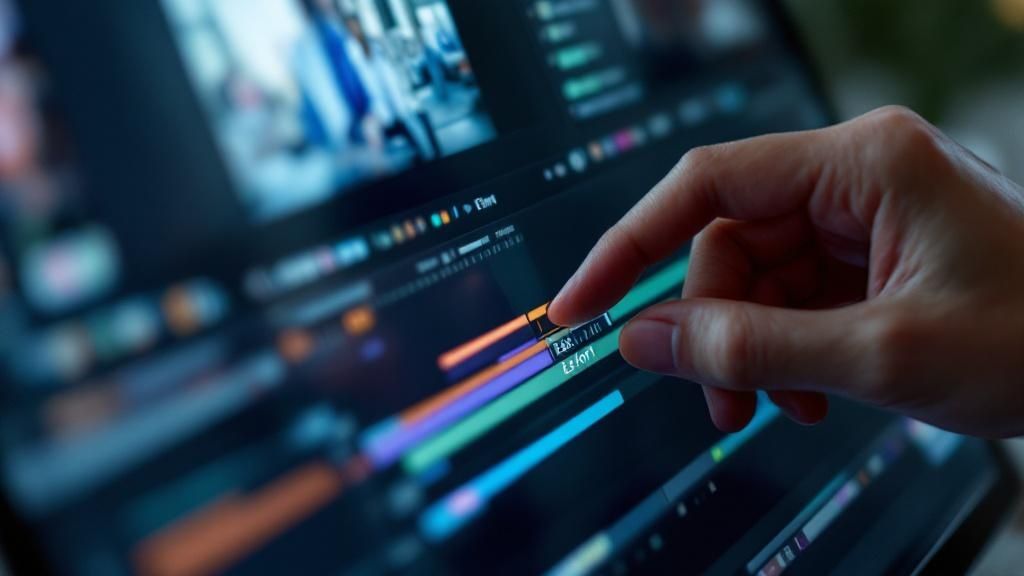
Once named, store them in a shared, organized cloud folder. And if you want to take your post-production to the next level, you can explore some of the best tools for video editing automation to help with tasks like trimming dead air or adding branding.
Navigating the Legal and Ethical Side of Recording
Before you even think about hitting that record button, let's talk about the ground rules. Recording conversations is a serious business, and overlooking the legal and ethical side of things can do more than just make people uncomfortable—it can land you in real trouble and shatter trust.
The single most important rule? You must get consent. It’s not optional.
Think of it this way: people have a right to know they're being recorded. Your job is to make sure they do, clearly and upfront. It's all about transparency and basic respect for privacy.
Getting a Handle on Consent Laws
Around the world, laws for recording conversations typically fall into two main camps. Some places follow one-party consent, which means as long as you (the person recording) know it's happening, you're legally in the clear.
But many other regions, and this is the crucial part, operate under two-party consent. This is often called "all-party consent," and it means every single person on the call has to agree to be recorded.
Since your meeting attendees could be dialing in from anywhere, the only safe bet is to act as if you're always in an "all-party consent" location. It’s the simplest way to stay protected.
Always assume you need permission from everyone on the call before you start recording. This single practice protects you, respects participants' privacy, and builds a foundation of trust.
This approach keeps you on the right side of the law, no matter where your attendees are.
How to Actually Ask for Permission
This doesn't need to be a big, awkward production. A quick, straightforward announcement at the start of the meeting is all it takes to get everyone on the same page.
Feel free to use or adapt these openers:
- "Just a heads-up, I'm going to record this call for our records. Is everyone okay with that?"
- "To make sure I don't miss any details, I'm about to hit record. If anyone has concerns, please speak up now."
- "Hey everyone, I'm recording this session so we can share it with folks who couldn't be here. Hope that's cool with all of you."
When you make this a standard part of how you kick off meetings, it just becomes another professional habit. For more tips on blending your voice with recordings, check out our guide on how to master screen recording with voice-over.
Storing Your Recordings Securely
The moment you save a recording, you become its guardian. That means you’re responsible for keeping it safe, especially if the call included sensitive client details, personal info, or confidential company data.
This isn't just good practice; it's a necessity. Regulators are paying much more attention to the privacy risks tied to recorded content.
It’s essential to be clear about how this data is handled, which is something a good privacy policy should cover. Being transparent builds trust with your team and your clients. For a better sense of how these documents work, reviewing different approaches to understanding privacy policies can be really insightful. By handling your recordings responsibly, you ensure you're using tools like Screendesk the right way and steering clear of problems down the road.
Got Questions About Recording Video Calls? We've Got Answers
Even with the best intentions, you're bound to run into a few questions when you first start recording your video calls. It happens to everyone. Getting those questions answered quickly is the key to feeling confident and making sure a tool like Screendesk is really working for you.
Let's walk through some of the most common hurdles people face. My goal here is to give you straightforward, practical advice so you can stop wrestling with tech and get back to having productive conversations.
Can I Record a Call Without Telling Anyone?
This question comes up a lot, and the answer is a hard no. From a technical standpoint, a screen recorder can obviously capture a call without anyone knowing, but doing so is a huge ethical misstep and, in many jurisdictions, flat-out illegal.
Trust and professionalism are built on being upfront. The only right way to do this is to clearly state that the call is being recorded right at the start. It’s a simple sign of respect for everyone's privacy and keeps you on the right side of consent laws. There's really no professional situation where secretly recording a call is the right move.
My Video Files Are Huge. How Do I Make Them Smaller?
Ah, the classic problem of massive video files. They're a pain to store and a nightmare to share. Thankfully, you have a couple of great ways to tackle this without making your video look like it was filmed on a potato.
Your first and best strategy is to adjust your settings in Screendesk before you even hit record. A few small tweaks can make a massive difference in the final file size.
- Lower the Resolution: Let's be honest, you probably don't need a 4K recording of your weekly team sync. Dropping the resolution to 720p is usually more than clear enough for viewing on a laptop and will result in a much, much smaller file than 1080p.
- Tweak the Frame Rate: For most conversations, you don't need buttery-smooth 30fps. Lowering it to 24fps can trim the file size, and for a standard call, no one will ever notice the difference.
If you've already recorded the file and it's still too big, a video compression tool is your next step. There are plenty of free and paid apps out there that can shrink a file significantly with very little loss in quality.
My Two Cents: It's always better to be proactive with your settings than reactive with compression. Dialing in the right resolution and frame rate before you record is the single most effective way to keep your files manageable from the get-go.
What's the Best Way to Share Recordings Securely?
Trying to email a big video file is a recipe for frustration. It’ll probably get bounced back by the server, and if it does go through, the quality might be compressed into oblivion. A far better and more professional approach is to use a dedicated cloud service.
Think Google Drive, Dropbox, or even an unlisted video on Vimeo. These platforms let you upload the full-quality recording and share it with a simple link. The real win here is the security controls. You can password-protect the link or restrict access to specific email addresses, giving you total peace of mind that your sensitive conversations stay private.
Help! Why Is There No Sound in My Recording?
This is probably the single most common technical hiccup, and 99% of the time, the culprit is an incorrect audio source setting. Before you kick off any important recording, you absolutely have to double-check your audio inputs.
To get it right, you need to make sure you're capturing two things:
- System Audio: This is the sound coming from your computer—in other words, the voices of the other people on the call.
- Your Microphone: This one’s obvious—it captures your own voice.
Get into the habit of running a quick 10-second test recording before every important call. Just say a few words, stop the recording, and play it back. If you can hear yourself and a bit of system audio, you're good to go. This simple check can save you a world of headaches.
Ready to put these common issues behind you and create perfect recordings every time? With Screendesk, you get intuitive controls and reliable performance that make recording video calls a seamless part of your workflow. Start your free trial today and see the difference for yourself.