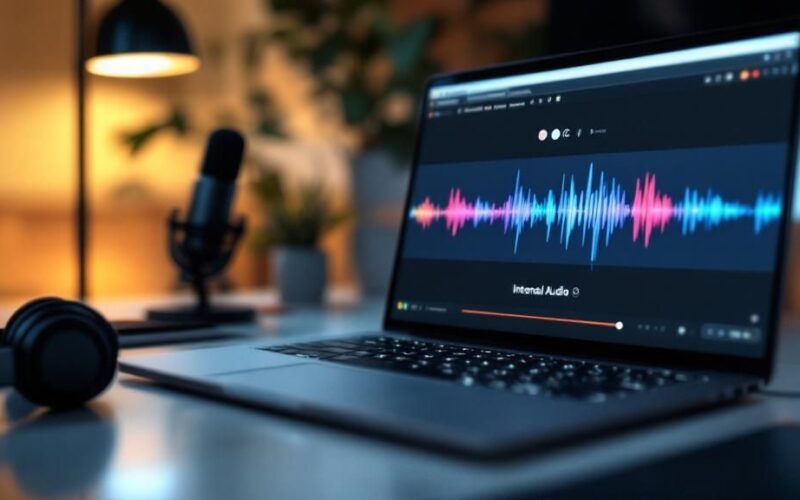
Ever hit “record” on a tutorial only to realize your audience hears more keyboard clatter than your actual demo? The trick isn’t splurging on a high-end mic—it’s tapping directly into your system’s audio. That way, you capture crystal-clear sound straight from the source.
Why Internal Audio Matters
You might pour hours into a software walkthrough or gaming showcase, only to have background noise steal the spotlight. Recording internal audio means you’re grabbing each notification ping or game soundtrack without ambient distractions.
This approach guarantees a polished result. No more barking dogs, room echo, or frantic typing ruining your message. And for anyone recording Zoom lectures, flawless audio can make life easier for both students and instructors.
The Growing Demand For Clean Audio
Creators, educators, and remote teams all agree: good audio is non-negotiable. The global screen recording market hit USD 1.2 billion in 2023 and is projected to reach USD 2.1 billion by 2031. For an in-depth look, see the screen recorder market growth.
High-fidelity sound sets professional content apart from the rest.
Capturing internal audio separates amateur content from professional productions. It transforms a distracting clip into an immersive experience.
Before you start your next project, take a look at scenarios where internal audio isn’t just nice to have—it’s essential.
Below is a quick summary of key use cases where capturing internal audio is essential for high-quality recordings.
| Scenario | Why Internal Audio Is Critical | Example Tool |
|---|---|---|
| Software Demos | Preserves notification chimes and UI sounds without background noise | OBS Studio |
| Gaming Videos | Delivers original soundtrack and in-game effects | NVIDIA ShadowPlay |
| Webinars & Online Lectures | Ensures every speaker and media clip is captured clearly | Screendesk |
Refer to this table when deciding whether to enable internal audio in your next screen capture.
- Software Demos: Capture alert sounds so viewers never miss a step.
- Gaming Videos: Record every explosion and soundtrack note in full fidelity.
- Webinars & Presentations: Archive sessions with studio-quality audio.
How to Record Your Screen with Audio on Windows
If you've ever tried to record your screen on Windows, you probably know the frustration. You're trying to capture a slick software demo, but all you get is muffled audio from your laptop mic, the distracting clack-clack-clack of your keyboard, or just dead silence. It feels like it should be simple, but getting clean internal audio can be a real headache.
Let's clear up the confusion and get you recording crystal-clear system audio.
First up, Windows does have a built-in option: the Xbox Game Bar. You can pull it up anytime by pressing Windows Key + G. It’s handy for a quick capture of a game or a single app, but that's where its usefulness ends. The Game Bar is notoriously finicky. It often refuses to record the desktop or File Explorer and is really only designed for one window at a time, making it a poor choice for any tutorial that involves switching between programs.
Moving Beyond the Basics with Dedicated Tools
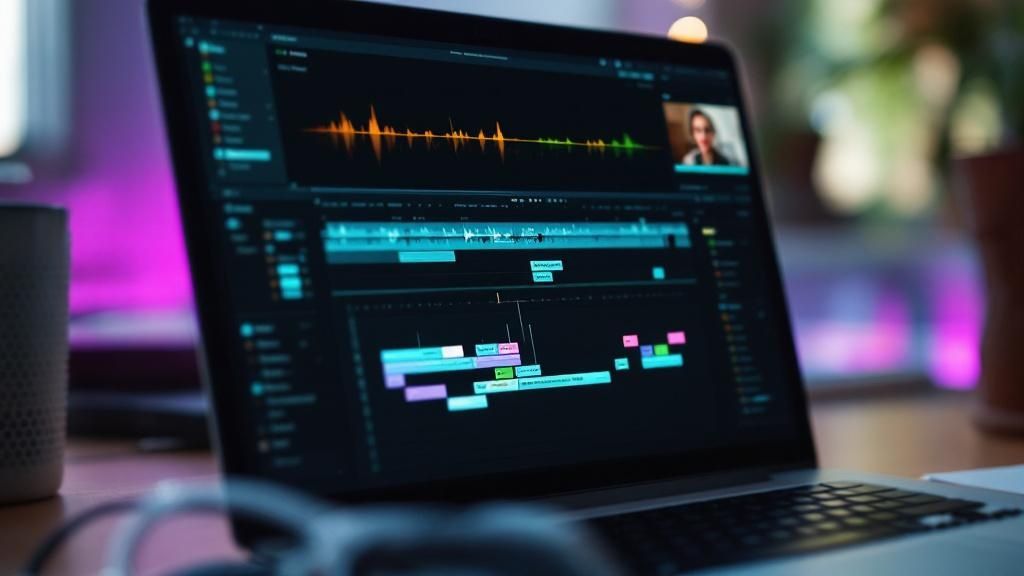
When the Xbox Game Bar just won't do the job, it's time to bring in a more powerful tool. Applications like OBS Studio or our own Screendesk give you the control you're missing. These programs are built from the ground up for high-quality screen capture, and that includes nailing the elusive internal audio.
The trick is telling the software exactly what to listen to. Instead of selecting your microphone, you need to point it toward your computer's own sound output.
Pro Tip: I can't stress this enough: always do a test recording. Before you dive into a 20-minute tutorial, record for 10 seconds. Play a YouTube video or a system notification sound. Then, play it back. This quick check saves you the immense frustration of discovering an hour's worth of work has no audio.
Getting started with any new recording software usually follows the same simple path.
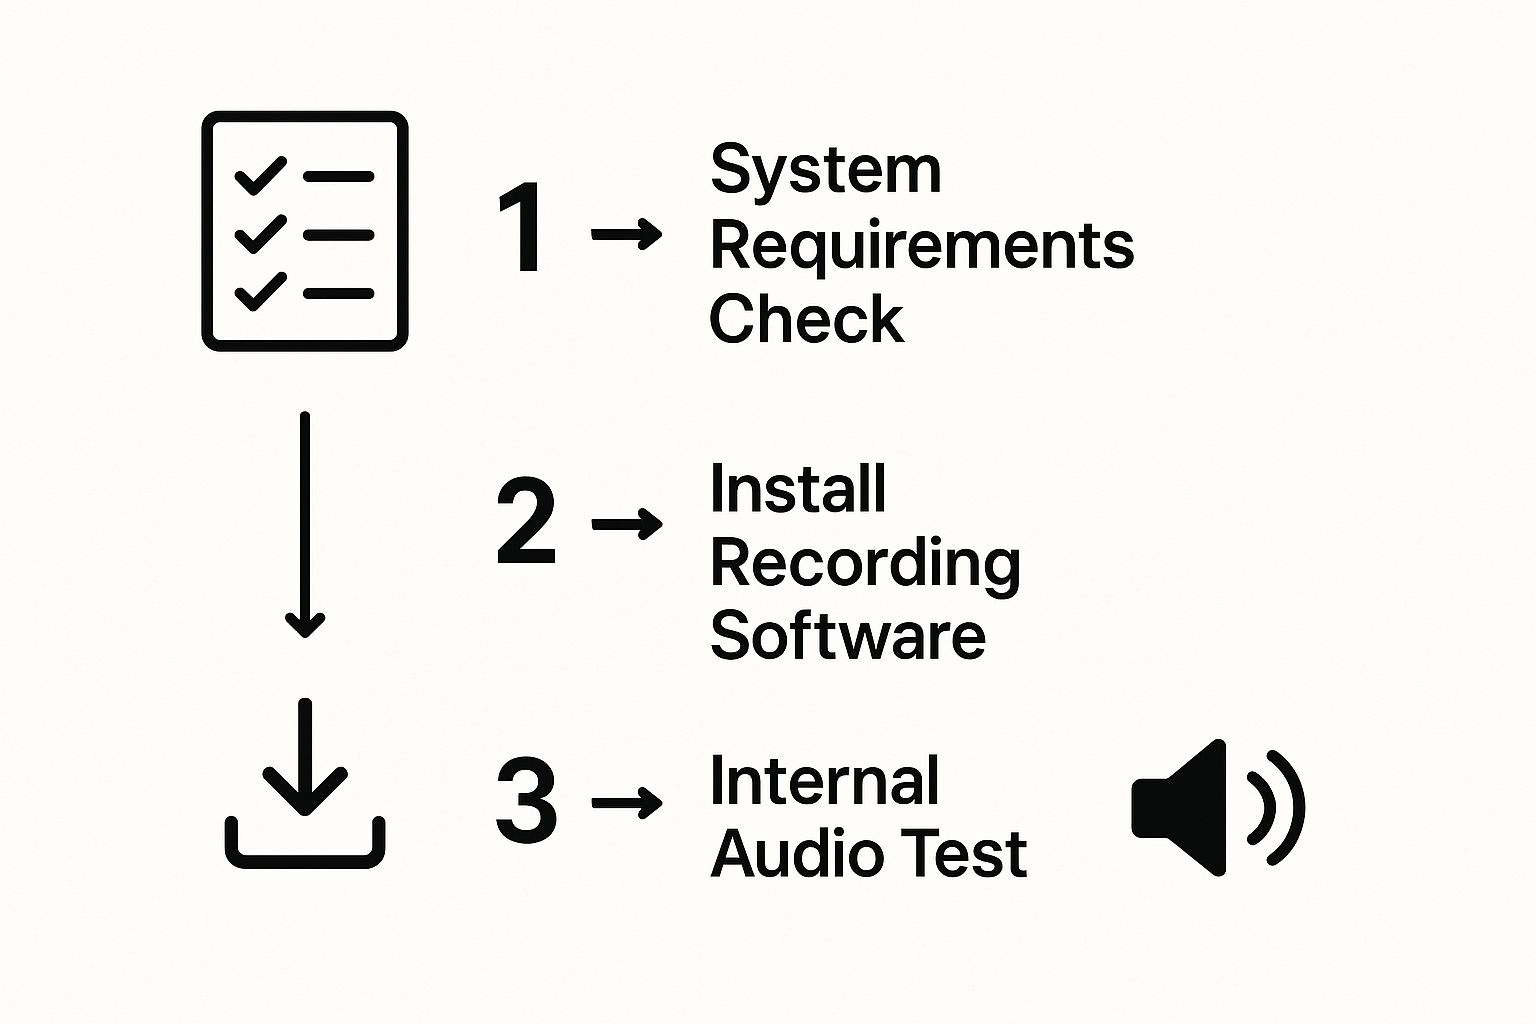
Following these fundamentals from the get-go is the best way to avoid having to re-record everything later.
Finding and Configuring Your Audio Source
So, where is this magical setting for internal audio? Honestly, it depends. The name and location can change based on your computer's hardware and the software you're using.
Here are the usual suspects to look for in your recording software's audio input settings:
- Desktop Audio: This is what many programs, like OBS Studio, call it. It's a straightforward option that grabs every sound your computer makes.
- Virtual Audio Driver: Some apps, including Screendesk, install a dedicated virtual audio device. This is often the most reliable method because the driver is built specifically to work with the recording software.
- Stereo Mix: This is an old-school Windows feature that you might have to enable yourself. Think of it as a virtual cable that loops your speaker output back into an input channel.
If you can't find Stereo Mix, you might need to turn it on manually. Here's how:
- Right-click the speaker icon in your taskbar and choose "Sounds."
- Click over to the "Recording" tab.
- Right-click anywhere in the blank space and tick "Show Disabled Devices."
- If "Stereo Mix" pops up, right-click it and hit "Enable."
Once it's enabled, you should be able to select it as an audio source in your recording program. If you need a refresher on the basics, our guide on how to record on-screen video is a great place to start.
One last thing: keep a close eye on your audio levels. In your recording software, you'll see a meter that bounces with the sound. If that meter is constantly hitting the red, your audio is "clipping," which results in a nasty, distorted sound. Adjust the volume slider for your desktop audio so that even the loudest sounds stay in the green and yellow zones. This small tweak is the secret to getting that polished, professional sound.
Mastering Screen Recording with Audio on macOS
Recording your screen on a Mac is pretty straightforward, but trying to capture crisp screen recording with internal audio can feel like hitting a brick wall. Apple’s focus on security and privacy means there's no built-in, one-click way to grab system sounds. That’s why when you open up QuickTime Player, the only audio options you see are for your microphone.
But don't worry, this is a common problem with some solid solutions. We'll walk through the most popular method using a virtual audio driver and look at a few simpler tools that get the job done without the extra steps.
The Virtual Audio Driver Solution
The most flexible way to capture internal audio on macOS is by setting up a virtual audio pipeline. It sounds more technical than it is. Think of it as creating a digital patch cord that sends your computer's sound from its output to a new input that your recording software can actually listen to.
The tool everyone uses for this is a free, open-source driver called BlackHole. Once you install it, it shows up on your Mac as a new audio device. The next step is to tell your Mac how to use it.
You’ll need to open the Audio MIDI Setup app (just use Spotlight search to find it). Inside, you’re going to create a "Multi-Output Device." This new device is key—it combines your real speakers or headphones with the BlackHole virtual driver. This lets you hear the audio yourself while also sending a copy over to your recording app.
By creating a Multi-Output Device, you’re telling your Mac to send system sounds to two places at once: your speakers so you can hear it, and the virtual driver so your software can record it. It’s the key to making this whole process work.
Setting Up QuickTime for Internal Audio
With your new Multi-Output Device ready, it's time to record.
First, pop over to your Mac's System Settings > Sound and choose the "Multi-Output Device" you just created as your main Output. This gets all your system audio flowing to the right places.
Next, open QuickTime Player and start a "New Screen Recording" from the File menu.
You'll see a small "Options" dropdown next to the record button. Click it, and under the Microphone section, you'll now find BlackHole listed as an option. That's the one you want.
That's it! When you hit record, QuickTime will capture your screen, and BlackHole will pipe in the clean, direct audio from your system. You've successfully set up your Mac for screen recording with internal audio.
This need for better audio and video capture isn't just a niche problem; it's a massive industry. The audio and video equipment market was already valued at USD 323.9 billion in 2025 and is expected to grow to USD 378.07 billion by 2029. This shows just how much people rely on high-quality audio for everything from professional tutorials to simple video messages. You can dig into these market trends on Research and Markets for more details.
Simpler Alternatives for Mac Users
If tinkering with audio settings sounds like a hassle, I get it. The good news is that many dedicated screen recording apps have figured this out and built their own solutions right into the software.
- Screendesk: Made for simplicity, Screendesk comes with its own audio driver. When you install the app, it takes care of the audio routing automatically. You can start recording system audio with a single click—no setup required.
- ScreenFlow & Camtasia: These are heavy-duty video editing and recording tools. Both ScreenFlow and Camtasia bundle their own audio drivers that install with the main application, making internal audio capture completely seamless.
These all-in-one tools are perfect if you want a solution that just works straight out of the box, letting you skip the manual configuration altogether.
Using Browser Tools for Quick Recordings
Sometimes you just need to capture something happening on your screen right now, without the headache of downloading and installing a dedicated program. This is where browser-based screen recorders are absolute lifesavers. They let you record directly from Chrome or Firefox, making the whole process fast and fuss-free.
These tools are surprisingly flexible. You can grab a recording of a single browser tab, a specific application window on your computer, or your entire desktop. It usually only takes a couple of clicks to get going.
Getting Started with Browser Recording
First things first: permissions. The moment you start a recording, your browser will pop up a request for access to your screen and maybe your microphone. This is a standard security step—it’s how your browser makes sure a website isn’t sneakily recording you without your consent.
After you've given it the green light, you'll see a simple interface asking what you want to record. The most critical setting for getting a clean screen recording with internal audio is the one labeled “Tab Audio” (or something very similar). This is the key. Selecting this option tells the tool to record the sound coming directly from the browser tab itself, completely ignoring your microphone.
Think of it this way: by choosing "Tab Audio," you're plugging directly into the webpage's sound source. That’s the secret to getting a crystal-clear recording of a webinar or video stream without any of the background noise, echo, or accidental coughs your mic would pick up.
This method is perfect for things like:
- Saving a key segment from a live webinar you're attending.
- Creating a quick product demo that runs inside your browser.
- Capturing an online video or presentation to watch later.
Pros and Cons of Browser-Based Tools
The biggest win for browser-based tools is pure convenience. There's nothing to install, and you can be recording in seconds on just about any computer. It’s incredibly handy. Tools like Screencastify or Camtasia's online recorder have really nailed this simple experience.
But, of course, there are some trade-offs. You're completely dependent on a good internet connection, since all the heavy lifting happens online. Free versions often come with limits on how long you can record or the final video resolution.
When you get into more complex jobs, like https://blog.screendesk.io/recording-video-calls/ with several people, you’ll start to feel the limitations. Browser tools are fantastic for quick, straightforward tasks, but for bigger projects that demand high-quality audio and more editing power, a dedicated desktop app will always give you more reliability and control.
Advanced Tips for Professional-Sounding Audio
Alright, so you’ve figured out how to capture your computer’s internal audio. That’s a huge win. But if you want to create content that really hooks people, nailing the audio quality is non-negotiable. It’s the difference between a decent screen capture and a truly polished, professional video.
Let's get into the weeds a bit. When you open up a tool like OBS Studio or Camtasia, you'll see settings for audio bitrate and sample rate. Don't just gloss over these. A higher bitrate, like 192 kbps or even 320 kbps, gives your audio more detail and richness. For the sample rate, 48 kHz is the sweet spot for video—it’s the industry standard for a reason.
Why You Should Record Audio on Separate Tracks
This next tip is a genuine game-changer. If there's one pro technique you adopt, make it this one: record your audio on separate tracks.
Picture this: you're recording a detailed software demo. You've got your voiceover from your microphone and the clicks and dings from the application itself. If you record them on a single track, they're stuck together forever. So when you accidentally cough right as a critical notification sound plays, you’re out of luck. You can't edit one without mangling the other.
Recording your mic and system audio to separate tracks gives you total freedom in the editing room. This is especially crucial when you’re doing a screen recording with internal audio and a voiceover.
With separate tracks, you can dial up the volume on your voice, surgically remove that air conditioner hum from your mic recording without touching the system audio, and mix everything together perfectly. It’s your get-out-of-jail-free card for audio mistakes.
This simple shift in your workflow can save you from having to re-record an entire session. If you want to dive deeper, we have a whole guide on how to screen record with a voice-over that lays out even more strategies.
Let AI Do the Hard Work for You
The next big leap in audio quality is coming from artificial intelligence. Not long ago, cleaning up noisy audio meant hours spent tinkering in complex software. Today, modern tools are building in AI features that do the heavy lifting for you.
These aren't just gimmicks; they are incredibly practical tools that can:
- Remove Noise: Think fan noise, keyboard tapping, or that annoying refrigerator hum. AI can isolate and zap them from your recording.
- Enhance Your Voice: Many tools can automatically boost your vocal clarity, making you sound like you recorded in a professional studio.
- Automatically Duck Audio: This is a classic radio trick. The AI can automatically lower your background music or system sounds when you start talking, then bring the volume back up when you stop.
This isn't just a niche trend. The market for AI-powered video editing tools is expected to explode, growing from USD 1.6 billion in 2025 to a massive USD 9.3 billion by 2030. It shows just how important clean, clear audio has become for everything from creating accurate captions to making content more accessible. Using these built-in AI tools is one of the fastest shortcuts to achieving that professional sound.
Common Screen Recording Questions Answered
https://www.youtube.com/embed/TnfB6tLHzNU
Once you start recording your screen and internal audio, you'll inevitably run into a few common snags. It happens to everyone. From a weird echo that ruins your take to bigger questions about what you're even allowed to record, let's get you some straight answers.
Think of this as your go-to FAQ for getting past those initial hurdles so you can focus on creating great recordings without the tech headaches.
Can I Record Internal Audio on Mobile Devices?
Yes, you absolutely can! Modern smartphones come with this capability baked right in. Both iOS and Android have native screen recorders that can grab the system audio for you.
The key is to make sure your phone's microphone is turned off before you start. On an iPhone, just long-press the screen record button in your Control Center and tap the microphone icon until it’s grayed out. For Android users, you'll usually find this toggle in the screen recorder's settings or its pop-up menu.
Keep in mind that some apps, especially streaming services like Netflix or Spotify, will block audio recording to protect their content. If your recording of a specific app is silent, that's almost certainly the reason.
Why Does My Recording Have an Echo?
Ah, the dreaded echo. This is easily the most common issue people face. It happens when your microphone picks up the sound playing from your computer's speakers, which then gets played back through the speakers and picked up again by the mic. It’s a vicious audio cycle.
The simplest, most effective fix? Wear headphones.
By sending the computer's audio straight to your ears, you stop the microphone from hearing it in the first place. This creates a clean separation between the system sound and anything you might be recording with your mic. If you need to capture both, a good screen recorder will let you record them on separate audio tracks for easy editing later.
Is It Legal to Record My Screen with Internal Audio?
This is a big one, and the answer is: it depends entirely on what you're recording.
It's generally fine to record your own work, create a software tutorial showing off a tool, or capture gameplay to share. The problems arise when you start recording content that belongs to someone else. Capturing copyrighted material like movies, music from streaming services, or private video calls without permission can land you in hot water.
For example, in a school or work setting, people often want to know how to record Zoom lectures effectively. The technical side is one thing, but getting permission is the most critical step.
Here are a few ground rules to live by:
- Always Get Consent: If you're recording a call or meeting, let everyone know they are being recorded before you start.
- Respect Copyright Law: Don't record and share content from services like Netflix or Spotify. It's almost always against their terms of service and copyright law.
- Check the Terms of Service: When in doubt, look up the rules for the specific app or platform you're recording.
Ultimately, it’s better to be safe than sorry. If you're not sure you have the right to record something, assume you don't. This guide is for informational purposes only and isn't a substitute for legal advice.
Ready to create flawless screen recordings with crystal-clear audio? Screendesk makes it simple. Eliminate background noise, capture system sounds perfectly, and resolve customer issues faster with our integrated video tools. Start recording with Screendesk today and see the difference for yourself.