
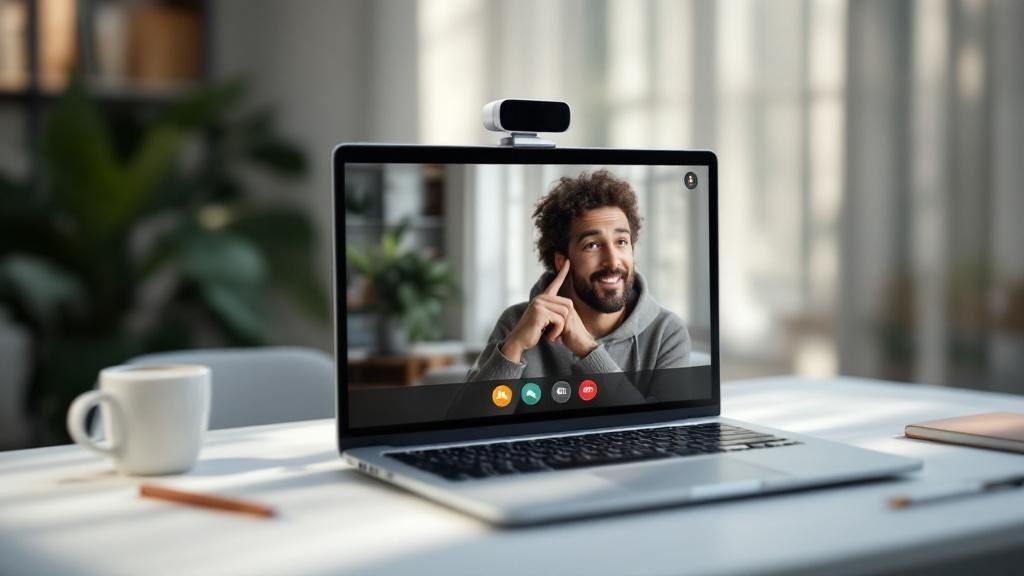
Let's be honest, hitting the basic "record" button on a video call isn't enough anymore. If you want to turn those conversations into something truly useful—a high-quality, shareable asset that captures every important detail—you need a better approach. That's where a dedicated tool like Screendesk comes in, transforming a simple chat into a valuable resource for your whole team.
Why High-Quality Call Capture Is a Game Changer
With remote and hybrid work now the norm, video calls are our new meeting rooms. These are the spaces where big decisions get made, projects move forward, and client relationships are forged. Just having the call isn't the whole story; what really matters is preserving the details with perfect clarity. It’s become a fundamental business need.
The numbers don't lie. Tools like Zoom and Microsoft Teams are at the heart of how we work. With Microsoft Teams clocking in 270 million daily active users in 2025, it’s obvious these platforms are central to our daily routines. The entire video conferencing market has seen explosive growth, with some experts predicting it could hit $60.17 billion.
Moving Beyond Basic Recordings
Here’s the problem: the built-in recording features on most platforms are pretty limited. They’re fine for a quick playback, but they aren't designed to create high-fidelity, lasting assets. When you capture video call content with a professional mindset, you unlock so much more potential.
A high-quality recording isn't just a backup; it's a strategic asset. Think of it as an unbiased record of what was promised, a powerful training tool for new hires, and the ultimate source of truth when a project gets complicated.
When you switch to a dedicated tool to capture your video calls, you start seeing immediate benefits:
- Enhanced Accuracy: You can finally put an end to the "he said, she said" confusion. A perfect record of the discussion clears up any doubt.
- Improved Team Alignment: Now everyone, even people who missed the meeting, can get the full context and stay on the same page.
- Powerful Training Resources: That expert demo or client onboarding call? It can be turned into a reusable training module for your entire team.
- Compliance and Documentation: For important conversations, you have a secure and verifiable record for compliance or to resolve any future disputes.
The Tangible Business Impact
Investing in a solid capture process delivers real, measurable results. Imagine taking a crystal-clear recording of a glowing client feedback session and turning it into powerful marketing material. When you see the impact of video testimonials for business, you'll understand why this is such a big deal.
Ultimately, treating call capture as a core function elevates it from a simple admin task to a driver of business intelligence, operational efficiency, and team unity. It’s about building a library of knowledge that empowers your entire organization.
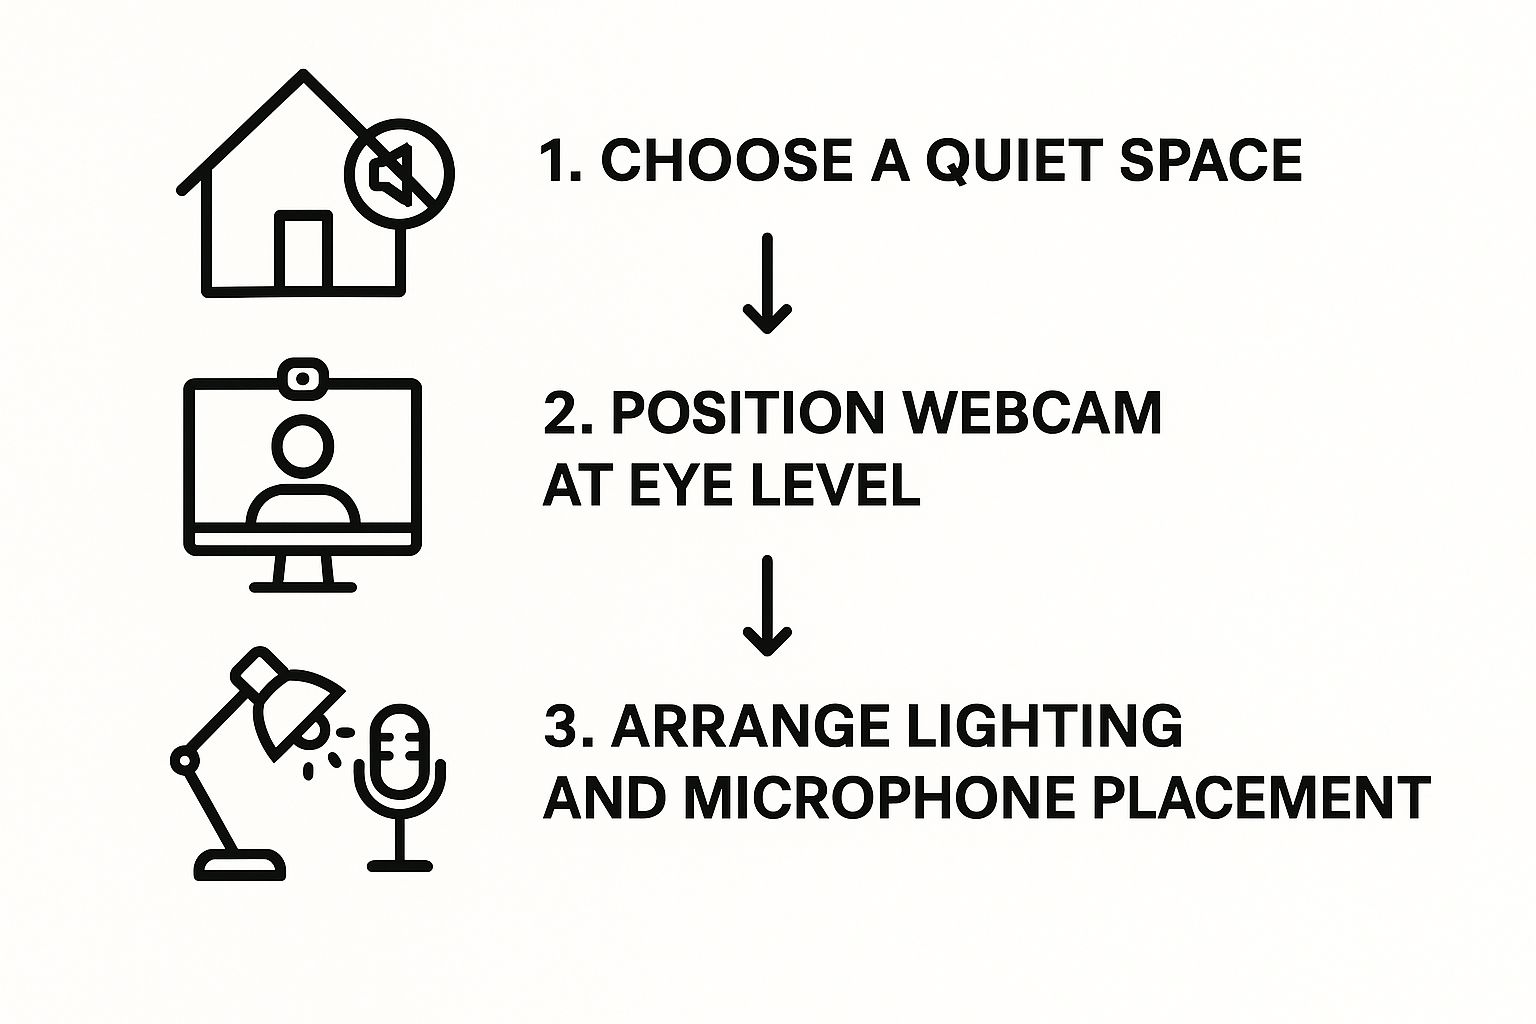
Setting the Stage for a Flawless Recording
Before you even think about hitting that record button, a little prep work goes a long way. Trust me, the difference between a frustrating, choppy video and a crystal-clear recording often comes down to what you do before the call ever starts. A few minutes of thoughtful setup can save you hours of editing headaches later.
First things first, let's clean up your digital workspace. Your computer is juggling a lot, and video processing is a resource hog. So, close every single application and browser tab you don't absolutely need for the call. I’m talking about your email, Slack, news sites—anything that could pop up with a notification or quietly steal CPU power in the background.
This isn't just about avoiding distractions. It's a direct line to better performance, helping prevent that awful lag or pixelation that always seems to happen right at a key moment. You're essentially giving your recording software the full, undivided attention of your machine.
Getting Your Physical Space Right
Your actual surroundings are just as critical as your digital ones. You don't need a fancy studio, but you do need to control a few key things. The most important? Find a quiet room. It's a non-negotiable. Trying to edit out background chatter from coworkers, barking dogs, or a passing siren is a nightmare.
Next up is lighting. Your goal is simple: light your face evenly without creating harsh, distracting shadows.
- Ditch the Backlight: Whatever you do, don't sit with a bright window or lamp behind you. You’ll turn into an anonymous silhouette.
- Face the Light: The best and easiest setup is to have your main light source—whether it’s a window or a lamp—in front of you. It's the most flattering and provides clean, even light.
- Try a Ring Light: For just a few bucks, a small ring light can be a total game-changer. It gives you consistent, professional-looking light no matter the time of day.
A clear agenda is just as important as your technical setup. Knowing the meeting's flow helps you anticipate when to start and stop recording, ensuring you only capture the essential parts of the conversation.
Final Tech Checks
With your space sorted, it's time for a quick tech run-through. Never, ever assume your gear is working perfectly. Open your recording software and do a quick test. Make sure it's actually picking up the right microphone. I can't tell you how many times I've seen people accidentally record with their tinny laptop mic instead of their good external one.
Glance at your camera feed, too. Is your framing good? Are you in focus? A quick internet speed test can also give you peace of mind and help you avoid any surprise connection drops. For really important recordings or more complex setups, it's worth looking into how professional Audio Visual Systems are designed to guarantee high-quality results.
These little steps might seem basic, but they form a simple, repeatable routine. Follow it, and you’ll be set up to capture video call recordings that are professional, clear, and genuinely useful every single time.
How To Capture Calls Seamlessly With Screendesk
Alright, you've prepped your space and tidied up your digital desktop. Now for the fun part: actually hitting record with Screendesk. What I love about this tool is how it gets out of your way and just works, giving you all the control you need without making you jump through hoops.
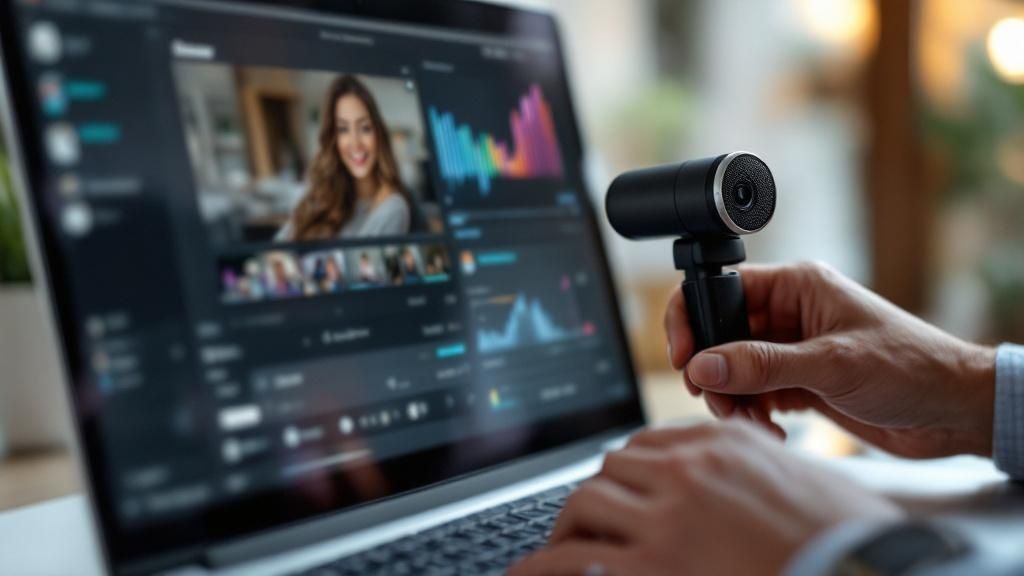
Let's walk through getting it set up for the perfect recording. Once you have Screendesk installed, the first thing you'll do is decide exactly what you want to capture. This is where it really outshines the basic, built-in recorders.
Selecting Your Video and Audio Sources
Picture this: you're about to run a client demo on Google Meet. You need to record the presentation window and the full conversation, but you definitely don't want to capture the constant stream of notifications popping up or the "ping" from your email client.
This is why setting your sources correctly is so important. The Screendesk interface is clean and makes it obvious how to select what you want to record.
As you can see, you can choose to record your entire screen, a specific application window, or even just a single browser tab. You get the same level of control over your audio. You can pick your high-quality external mic for your own voice and simultaneously capture the system audio to hear your client clearly. This dual-source audio capture is a game-changer for getting clean, intelligible recordings.
My biggest tip: Always choose to record a specific application window (like Zoom or Google Chrome) instead of your entire screen. This single habit prevents you from accidentally recording personal notifications or sensitive info, keeping your final video looking polished and professional.
If you want to see this in action, check out this complete guide on how to record a video call which covers even more advanced setups.
Choosing the Right Screendesk Recording Mode
To make the choice even clearer, think about what you're trying to achieve with your recording. Here’s a quick breakdown to help you pick the right mode every time.
| Recording Mode | Best For | Key Benefit |
|---|---|---|
| Full Screen | Recording tutorials that involve multiple applications or showing your entire desktop workflow. | Captures everything you see, providing complete context. |
| Application Window | Most video calls (Zoom, Teams), software demos, and presentations within a single app. | Keeps the recording focused and prevents accidental capture of private notifications or other apps. |
| Browser Tab | Recording a specific web-based presentation, a webinar, or a single webpage walkthrough. | The most private and focused option, isolating the recording to just one tab in your browser. |
Ultimately, choosing the right mode is about minimizing post-production work. Application Window is my go-to for 90% of video calls because it delivers a clean, ready-to-use file.
Customizing Your Recording Settings
Once your sources are locked in, you can quickly fine-tune the final details. Screendesk lets you pick your video quality, which is great for balancing file size with clarity. You can also easily toggle your camera feed on or off if you want that picture-in-picture effect.
Let’s apply this to another common scenario—leading a team brainstorm on Zoom. Here’s how I’d set up Screendesk for that:
- Video Source: I'd select the Zoom application window. This keeps the focus on the meeting and any shared whiteboards.
- Audio Source (Microphone): I'd choose my best external microphone so my own ideas come through loud and clear.
- Audio Source (System): I’d make sure system audio is enabled. This is crucial for capturing every idea shared by the team.
- Camera: I would keep my webcam enabled to add that personal touch and capture everyone's reactions.
Taking just a minute to dial in these settings before you record makes a massive difference. You capture only what you need, which means less time spent editing later and a more valuable, shareable asset for your team.
Navigating Recording Consent and Ethics
Before you even think about hitting the "record" button on a video call, there’s a much more important step to take—one that’s all about trust. Getting into the legal and ethical weeds of recording might seem daunting, but it really boils down to one simple idea: always be transparent and get clear permission.
Skipping the consent step isn't just poor form; it can have real legal consequences. Recording laws can be a real minefield, changing dramatically from one state or country to another. The main difference you'll encounter is the concept of one-party versus two-party consent.
One-Party vs. Two-Party Consent
Knowing which rule applies is absolutely essential to staying on the right side of the law.
- One-Party Consent: In states with these laws, only one person on the call needs to know it's being recorded. That person can be you.
- Two-Party Consent: In other areas, often called "all-party" consent states, you need explicit permission from every single participant before you can legally record.
So, what happens when you’ve got people joining from all over the map? The safest bet is to always follow the strictest rule.
To avoid any legal headaches and show respect for everyone's privacy, I always act as if I'm in a two-party consent state. It's a simple policy: make sure everyone knows they're being recorded and gives you the green light.
Adopting this practice eliminates any legal gray areas and helps build a foundation of trust.
How to Ask for Consent
The best way to handle this is to make it a seamless part of kicking off your meeting. Don't hide it in a lengthy email or a pre-read document nobody looks at. Just state it clearly right at the start of the call. This upfront approach makes people feel respected and secure. For a deeper dive into this, our guide on secure video conferencing has some great pointers.
Here are a couple of straightforward ways you can ask:
- "Hey everyone, just a quick heads-up that I'll be recording this session so we can share it with the team members who couldn't join. Is everyone comfortable with that?"
- "Before we get started, I want to let you all know this call will be recorded for training purposes. Please speak up if you have any concerns."
Pause for a moment and wait for people to respond. A simple round of verbal "yes" or head nods is all you need. Making this a standard practice protects you, your company, and the professional relationships you’ve worked hard to build.
As more of our work happens remotely, these ethical lines are more critical than ever. The U.S. video conferencing market was valued at a staggering $10.8 billion in 2024 and is only expected to climb. You can read more about this trend and its business implications in this detailed market report. This growth just underscores how many important conversations are now taking place online, making clear consent an absolute must.
Pro Tips for Professional-Grade Audio and Video
So you've got the basics down. You know how to hit record and capture your call. Now, let’s get into the details that make a real difference—the small tweaks that take your recordings from "good enough" to genuinely professional.
If there's one thing you should focus on, it's your audio. Seriously. Your laptop's built-in mic just isn't cut out for high-quality recording. It's designed for convenience, which means it picks up every distracting sound, from your keyboard clicks to the echo in your room.
Investing in a decent external USB microphone is the single biggest leap in quality you can make. These mics are built to capture your voice with clarity and warmth, filtering out the background noise that makes recordings hard to listen to. You don't need a high-end studio setup; even an entry-level model will sound miles better than your computer's default.
Fine-Tuning Your Visuals
With your audio sounding crisp, it's time to sharpen up your video. How you look on camera directly influences how you're perceived. The good news is that great video quality is less about having a fancy camera and more about smart setup.
First, get your camera to eye level. Staring down into a laptop camera isn't a great look, and aiming it up from below can make you seem distant. A stack of books or a simple laptop stand does the trick perfectly. This creates a much more direct and personable connection with whoever is watching.
Lighting is the other half of the visual equation. As we mentioned before, always face your main light source.
- Embrace Natural Light: If possible, set yourself up facing a window. It provides soft, flattering light that costs absolutely nothing.
- Dodge Overhead Lights: Lighting from directly above creates unflattering shadows. A better option is a lamp placed in front of you and slightly to one side.
- Keep it Consistent: If you record frequently, figure out a lighting setup you can easily replicate. This gives all your videos a consistent, polished feel.
Capturing high-quality video is crucial, especially for important meetings like job interviews. Many of these same techniques apply when you need to capture video call sessions for hiring. To dive deeper into that specific scenario, check out this excellent guide on how to record a video interview like a pro.
Smart Habits for After You Record
Your job isn’t quite finished when you click the stop button. A couple of simple post-recording steps will save you a world of pain later and turn that raw file into a truly useful asset.
Start with a clear file naming system. Don't leave your recordings with generic names like Screen-Recording-2024-10-26. Instead, use a descriptive format that tells you what's inside at a glance, like ClientDemo-ProjectX-2024-10-26.mp4. It’s a tiny habit that makes finding a specific recording weeks or even months later a breeze.
Next, give it a quick trim. Nearly every video call recording has a few awkward seconds at the start and finish—the "is this thing on?" moments and clunky goodbyes. Use a simple video editor to snip these off. It's a fast edit that instantly makes your video feel more polished and professional.
These tips are all about creating good habits. When you focus on clear audio, thoughtful lighting, and organized post-production, every time you capture a video call, you're creating a high-quality asset that reflects well on you and your work.
Have Questions About Capturing Video Calls? Let’s Clear Things Up.
Even with the best preparation, you’re bound to run into a few snags when you start capturing video calls regularly. Knowing how to hit the record button is one thing, but dealing with the real-world hiccups that come up is another. Let's walk through some of the most common questions I hear, so you can feel totally confident in your setup.
One of the biggest worries is always security. What do you do when a recording accidentally captures sensitive customer data or a confidential strategy session? The best defense is a good offense—start by choosing a recording method that limits this risk from the get-go. For instance, recording a specific app window is much safer than capturing your entire screen.
But if sensitive info does make it into the recording, your next steps are critical. Always store the file in a secure, access-controlled folder. If only a small part of the call is sensitive, a quick trim in a simple video editor can create a "clean" version that's safe to share more widely.
“Help! My Recording Has No Audio!”
This is easily the most frustrating problem you'll encounter. You wrap up an incredible client call, go back to watch the recording, and… nothing. Just silence. It’s a gut-wrenching feeling, but it almost always comes down to a simple mistake in the pre-flight check.
More often than not, the culprit is an incorrect audio source. Your recording tool might have defaulted to a microphone that wasn't plugged in, or it might have failed to grab the system audio (the sound coming from your computer, like your guest's voice).
The only way to beat this is to build a solid habit: always do a quick, 5-second test recording before the real meeting kicks off. This simple check confirms that both your mic and the system audio are coming through loud and clear. It’ll save you a world of disappointment.
Unfortunately, if you end up with a silent video, there’s no magic wand to bring the audio back. It’s all about prevention. Just take a moment to double-check your audio inputs in your recording software before you start the main event.
"How Do I Share These Huge Video Files Securely?"
You did it. You recorded a fantastic, hour-long training session, but the file is a massive 5 GB. Emailing it is a non-starter, and just dropping a public link on a generic file-sharing site feels risky, especially with confidential content. So, how do you get it to your team without the hassle or the security risk?
Your best bet is to use a dedicated video hosting platform or a secure cloud storage service. These platforms are designed specifically for large files and give you much more control over who sees your content.
When sharing, here are a few best practices I always follow:
- Use Password Protection: It's a simple but effective layer of security. Only people with the password can access the video.
- Set Link Expiration: If the content is only relevant for a week, make the link expire after seven days.
- Control Download Permissions: Ask yourself: do they need to download the file, or is streaming enough? Restricting downloads keeps your content from being passed around without your knowledge.
These features provide fine-grained control over your recordings, ensuring your valuable assets stay secure while reaching the right people. Thinking through these common situations ahead of time will help you build a reliable workflow to capture video call content without the stress.
Ready to capture video calls with unmatched clarity and simplicity? Screendesk provides all the tools you need for high-quality, secure recordings directly within your workflow. Get started with Screendesk today and see how easy professional call capture can be.