
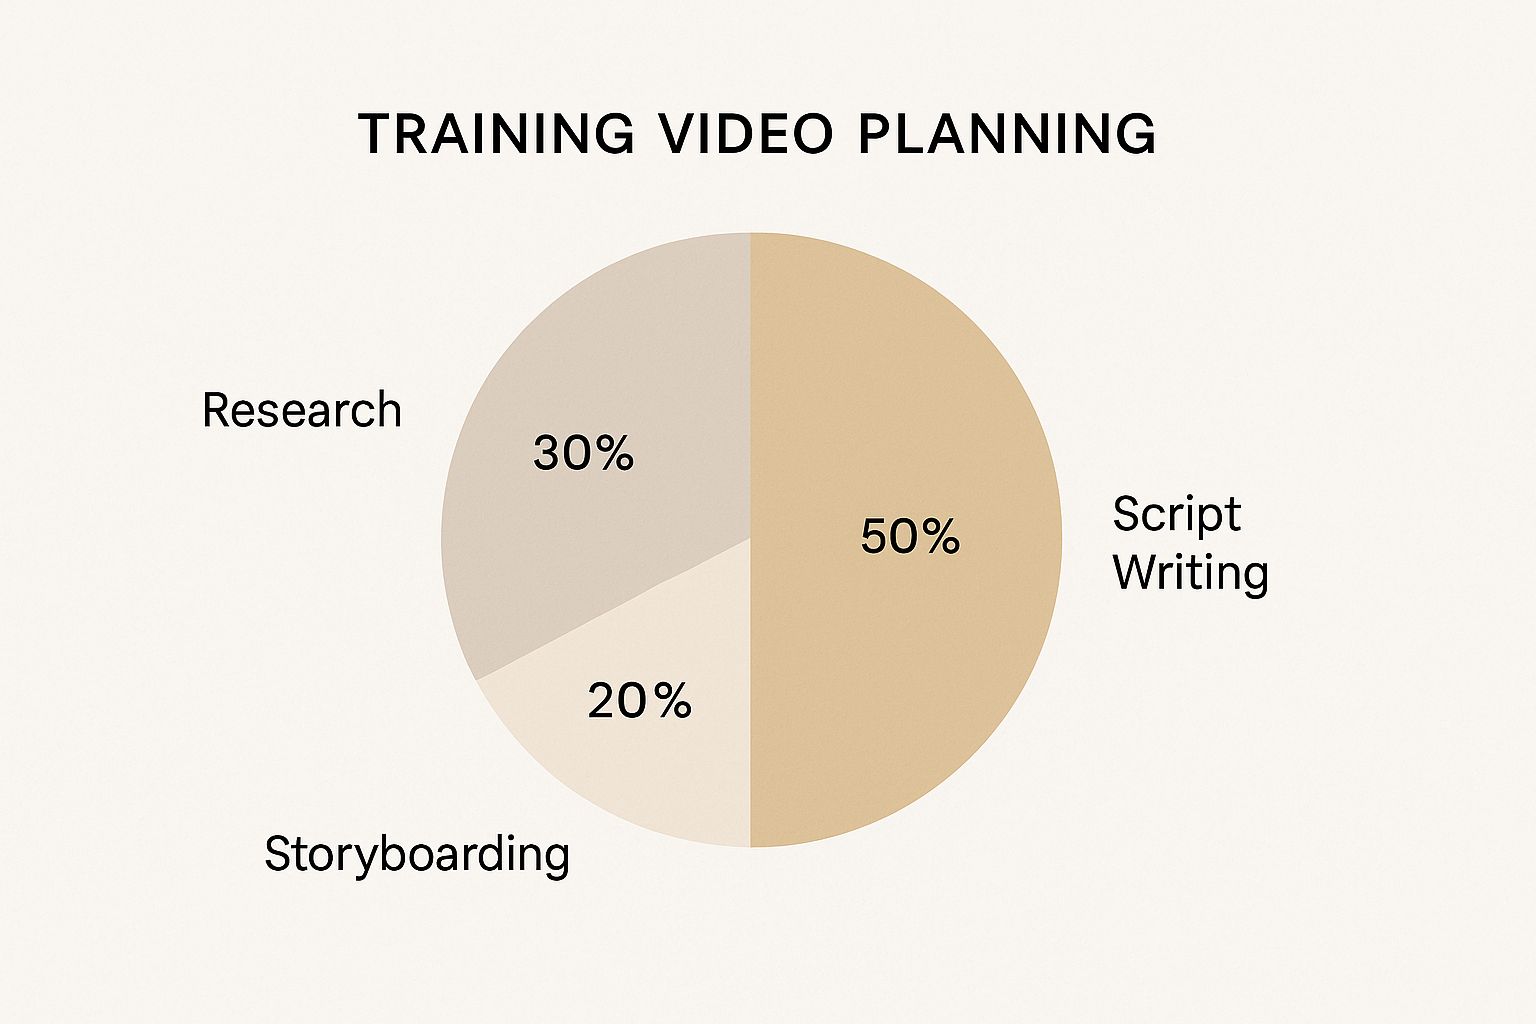
Crafting Your Training Video Blueprint: Strategic Foundations
Before hitting record, remember that a successful training video needs careful planning. Just like building a house, a solid foundation is key. This starts with learning objectives. These objectives are your blueprint, guiding every decision, from content creation to how you share the video. Think of them as your destination on a map—knowing where you're going keeps you on track.
Understanding your target audience is also essential. This means identifying their current knowledge, how they like to learn, and their specific needs. Are you training new employees on company software or experienced professionals on advanced techniques? This difference will shape your video's tone, style, and difficulty. Analyzing your audience helps tailor your message, ensuring the training resonates and achieves its goals.
Breaking down complex information into smaller parts is crucial for keeping viewers engaged. A structured approach is best. Dividing your content into logical modules helps learners process information step-by-step, preventing them from feeling overwhelmed. It's like building with one brick at a time, rather than trying to put the entire house together all at once. You might be interested in: How to master video creation.
Defining Measurable Outcomes
Setting measurable outcomes is just as important as clear objectives. These outcomes provide a way to evaluate the effectiveness of your video beyond simply how many people watched it. Look beyond passive metrics like views and consider active engagement, how viewers apply the knowledge, and whether their performance improves. How will you know if your video truly helped? Measurable outcomes provide the answer, allowing you to improve based on data and real results. Video marketing statistics show that 73% of marketers prefer explainer-style videos for training, emphasizing clarity and keeping things short. Companies invest over half their video budgets in such content, as 89% of viewers report making decisions after watching instructional videos. Find more detailed statistics here. Short videos (under 1 minute) see 50% viewer retention rates. This preference for concise, visual tutorials is changing corporate training, with 95% of video marketers believing it's essential for their success.
Visualizing Your Story
Finally, creating a visual storyboard from your learning objectives and content is highly recommended. This helps you see the video's flow, plan transitions, and decide what visuals you need. A storyboard is like a movie preview, letting you see how everything works together before filming. This streamlines production and leads to a more polished final product. This detailed planning sets the stage for an effective training video that engages viewers and promotes real learning.
Essential Production Tools: Finding Your Perfect Tech Stack
Creating effective training videos depends on choosing the right tools. This doesn't always mean buying the most expensive equipment. Instead, it's about understanding your needs and finding technology that fits. This section breaks down essential tools, from cameras and microphones to lighting and editing software, offering solutions for different learning environments and content types.
Cameras: From Smartphones to DSLRs
Your camera is your gateway to the learning world. For beginners or those on a tight budget, smartphones are surprisingly capable video tools. Modern smartphones offer great video quality and are readily available. However, for more polished videos or situations needing special features like depth of field, a dedicated camera may be a better option. DSLRs and mirrorless cameras offer higher resolution, interchangeable lenses, and advanced manual controls for greater creative flexibility. Your training environment also matters. A small, well-lit office might only need a basic setup, while larger spaces or outdoor locations might require more advanced equipment.
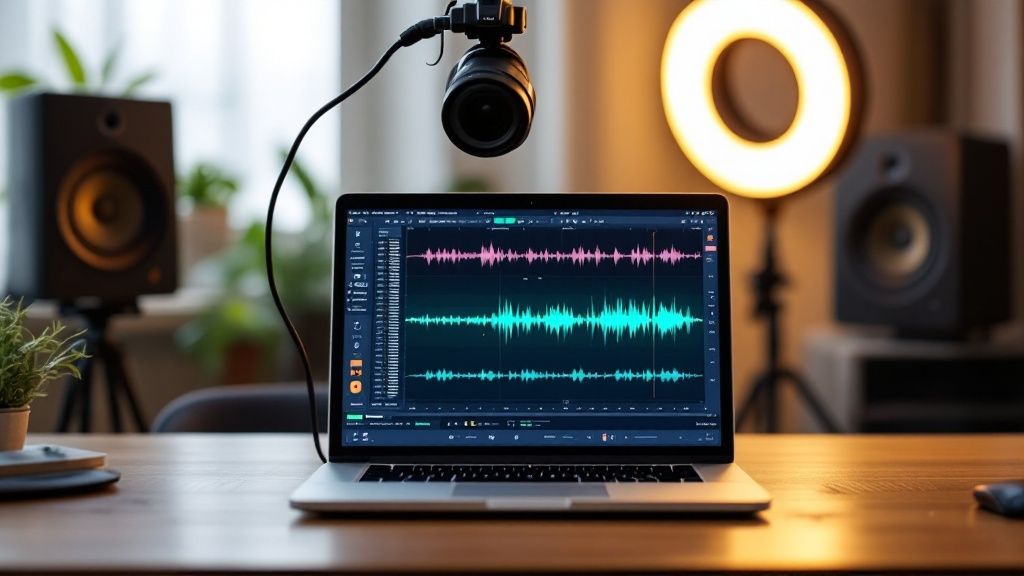
Audio Clarity: Microphones For Professional Sound
Clear audio is as important as high-quality video. Professional audio greatly improves learner engagement, while muffled or distorted audio can be a distraction. While convenient, built-in microphones just don’t cut it. Investing in an external microphone is a worthwhile investment for creating professional-quality training videos. Consider options like lavalier microphones for close-up recording, USB microphones for versatility, or shotgun microphones for capturing specific sounds in noisy environments. Your choice depends on your setup and budget.
Lights, Camera, Learn: Illuminating Your Training
Good lighting is essential for a visually appealing and engaging learning experience. Natural light is great, but having dedicated lighting allows for greater control and consistency. A basic three-point lighting setup—a key light, fill light, and backlight—can dramatically improve video quality. Even affordable LED panels can make a difference. Good lighting not only enhances the look of your videos but also helps ensure clarity, especially for demonstrations or product showcases.
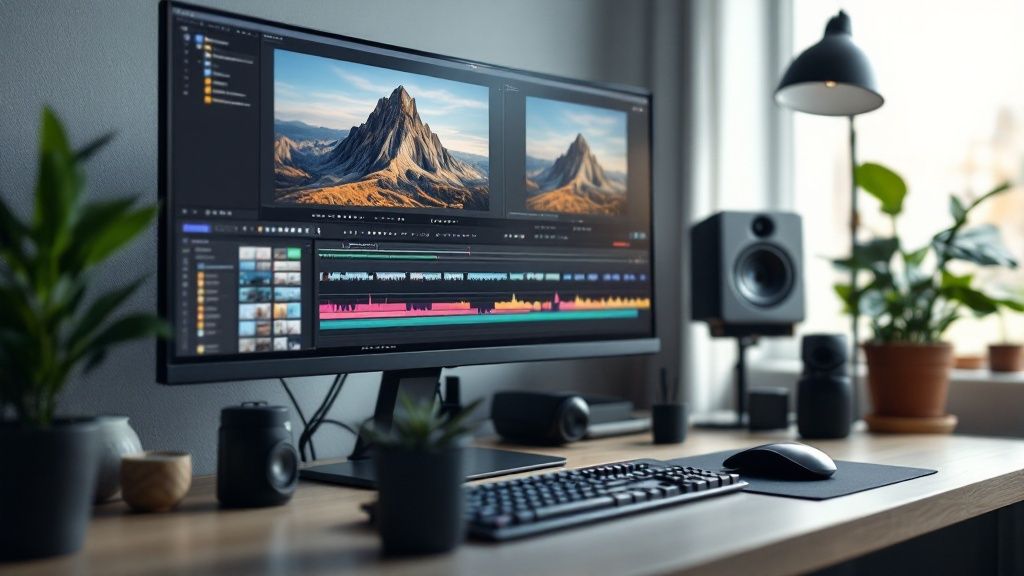
Editing Software: Shaping Your Story
Finally, choosing the right editing software is key to transforming raw footage into a polished learning experience. User-friendly options like iMovie or DaVinci Resolve are good starting points, offering a mix of powerful features and intuitive interfaces. More advanced software, such as Adobe Premiere Pro or Final Cut Pro provides professional-level control for complex projects. Specialized tools like screen recorders and animation software can be invaluable for certain training content. Consider your technical skill, budget, and the complexity of your training videos when choosing your editing platform.
Many businesses invest significantly in training video production. In 2025, producing a standard training video costs between $400 and $2,000 per minute, with established brands spending upwards of $3,400 per minute for premium quality. Find more detailed statistics here.
The data chart below shows the distribution of spending on training video production per minute.
As the chart shows, the largest segment (33.57%) invests between $2,501 and $4,000 per minute, highlighting the importance placed on high-quality content. Roughly 20% of marketers spend between $1,100 and $1,700, and another 20% allocate between $1,701 and $2,500. This data shows the link between budget and perceived quality, as 68% of professionals believe higher costs mean better quality. Startups tend to prioritize cost-effectiveness (under $1,400/minute), while larger organizations prioritize higher learner engagement with animation and other premium elements. Choosing the right tools is the first step to creating engaging and effective training videos that achieve your learning goals and fit your budget.
To help you choose the right tools for your needs and budget, we've put together a helpful comparison table:
Equipment Options for Different Budget Levels
This table compares essential equipment options across different budget ranges to help readers make informed purchasing decisions.
| Equipment Category | Budget (<$500) | Mid-Range ($500-$1500) | Professional ($1500+) |
|---|---|---|---|
| Camera | Smartphone with good video capabilities | DSLR or Mirrorless camera (entry-level) | Professional cinema camera |
| Microphone | Lavalier or USB microphone | Condenser microphone with audio interface | Shotgun microphone with boom pole and recorder |
| Lighting | Basic LED panel lights | Three-point lighting kit with softboxes | Professional studio lighting setup |
| Editing Software | iMovie, DaVinci Resolve (free version) | DaVinci Resolve (Studio version), Filmora | Adobe Premiere Pro, Final Cut Pro |
This table provides a general overview. Specific equipment recommendations will depend on your individual needs. For example, a vlogger might prioritize audio, while someone creating product demos will likely focus on high-quality video. Choosing the right tools is key to creating engaging training videos that meet your learning objectives and stay within your budget.
Scripting That Sticks: From Information to Engagement

A well-crafted script forms the foundation of any engaging training video. It's the bridge between raw information and a compelling narrative that truly connects with your audience. Just like an engaging teacher, your script needs to hold viewer attention and make learning easy. This means striking the right balance between informative content and an interesting story.
Structuring Your Script for Maximum Impact
The problem-solution-application framework offers an effective way to structure your training video script. This framework mirrors real-world learning experiences:
-
Problem: Start by highlighting a challenge or problem that your training will tackle. This instantly makes the content relatable to the viewer. For example, a training video on using Screendesk for customer support could begin by illustrating the difficulties of troubleshooting technical issues without visual aids.
-
Solution: Next, present your training topic as the answer to the problem. This highlights the value of your video. This is where you'd explain how Screendesk's screen recording and live video features simplify troubleshooting.
-
Application: Finally, demonstrate how viewers can apply the solution in practical situations. This reinforces what they’ve learned and helps them retain the information. Walk viewers through a demonstration of Screendesk in action, resolving a typical customer issue.
From Technical Jargon to Accessible Language
Training videos often deal with complex or technical subjects. Your script, however, should translate this information into everyday language that everyone can grasp. This doesn't mean dumbing down the content or losing accuracy. It's about finding the sweet spot between detail and clarity. Imagine translating a technical manual into plain English, keeping the core meaning while making it easier to understand.
One helpful technique is to use analogies and real-world examples to illustrate complex ideas. For instance, if you're explaining a software feature, compare it to something familiar to your audience, like using a common app. This helps viewers link new information to existing knowledge, making it more digestible and memorable.
Visualizing Your Story Through Storyboarding
Storyboarding is essential for creating effective training videos. It's where you visually map out the video's flow, plan transitions, and determine how to present information. A storyboard acts as a visual guide, showing how your script will appear on screen. This includes elements like:
- Visual transitions between scenes
- Placement of text overlays and graphics
- Demonstration sequences
Storyboarding helps you spot potential problems before filming, saving valuable time and resources. Visualizing your script ensures a more polished and effective final product. This careful planning sets the stage for a training video that engages viewers and achieves its learning goals. A strong script is the first step toward creating training videos that truly resonate with your audience.
Behind the Camera: Filming Techniques That Elevate Learning
This section explores the practical side of filming. We'll cover techniques for capturing high-quality video and audio specifically for training videos. Even the best training script won't connect with your audience if the filming is subpar. Filming is where your planning becomes reality, but it also presents unique challenges. We'll explore those challenges and offer practical solutions. By the end of this section, you'll be equipped to create professional-looking training videos that maximize learning.
Camera Setup: Framing, Rule of Thirds, and Depth of Field
Setting up your camera correctly is the foundation of professional-looking videos. There are a few core principles to keep in mind:
-
Framing: Framing your subject properly directs the viewer's attention and emphasizes key information. Think of it like composing a photograph. The position of your subject within the frame tells a visual story.
-
Rule of Thirds: Visualize a 3×3 grid overlaid on your screen. Positioning your subject at the intersection of these lines creates a more engaging and visually appealing composition. This avoids static, uninteresting shots.
-
Depth of Field: This describes the area of your image that is in focus. A shallow depth of field blurs the background, highlighting the subject. This is particularly helpful for product demos or demonstrations. A larger depth of field, where more of the image is sharp, is better suited for broader scenes.
By applying these framing principles, you can ensure your training videos are visually appealing and guide the viewer's eye to the most important elements. These techniques aren't just about aesthetics; they directly contribute to clarity and learning.
Lighting for Learning: Enhancing Visibility and Professionalism
Good lighting is essential. It improves visibility and adds a professional touch. While natural light can be useful, dedicated lighting equipment offers greater control and consistent results.
A three-point lighting system is a standard approach:
-
Key Light: This is your main light source, positioned slightly to the side and in front of your subject. It provides the primary illumination.
-
Fill Light: This softer light, placed opposite the key light, fills in shadows and reduces contrast. It creates a more balanced and softer image.
-
Backlight: Positioned behind the subject, the backlight separates them from the background. This adds depth and prevents the subject from appearing flat against the backdrop.
Even using affordable LED panels for this three-point setup will drastically improve your video quality. Good lighting doesn't just make your videos look good; it also improves clarity, which is particularly important for training demonstrations.
Audio Excellence: Eliminating Noise and Echo
Clear audio is just as crucial as clear video in effective training videos. Poor audio is distracting and can make it hard for viewers to learn. While built-in microphones are convenient, they often capture unwanted background noise. Using an external microphone significantly enhances audio quality.
Here are a few microphone options:
-
Lavalier Microphones: These small, clip-on mics provide clear audio close to the speaker, even in noisy environments. They are ideal for interviews and presentations.
-
USB Microphones: These versatile mics connect directly to your computer and often include noise-reduction features and easy setup. They're great for voiceovers and screen recordings.
-
Shotgun Microphones: These highly directional mics focus on sound directly in front, minimizing background noise. They're an excellent option for on-location filming.
Beyond choosing the right microphone, consider your recording space. Minimize background noise by selecting quiet locations or using sound-absorbing materials. Addressing these audio considerations allows learners to clearly hear and focus on the training material. High-quality video and audio combine to create engaging and impactful training videos. With these tips, you're well on your way to creating professional training content that effectively delivers your message.
Editing For Maximum Learning Impact and Retention
The editing process transforms raw footage into a polished training video. This stage shapes the viewer's learning experience and ensures your video achieves its goals. It's more than just assembling clips; it's about crafting a cohesive learning journey. Think of it like sculpting—starting with a rough block and carefully chiseling it into its final form.
Organizing Your Footage For Clarity
First, organize your footage. Arrange clips logically to follow your script and storyboard. This ensures a smooth, easy-to-follow flow of information. A clear structure is crucial for understanding. Imagine a book with jumbled chapters—confusing and disruptive. A disorganized video has the same effect on learning.
Pacing: Balancing Information and Attention Spans
Pacing keeps learners engaged. Thorough instruction is important, but consider viewers' attention spans. Vary the pace for a dynamic experience. Faster cuts during demonstrations create excitement. Slower segments during explanations allow viewers to absorb key concepts. Well-paced videos maintain focus and prevent cognitive overload. Learn more in our article about mastering customer service video training.
Visual Aids and Graphics: Reinforcing Key Concepts
Visual aids, like text overlays, graphics, and animations, enhance learning. These elements should complement the content, not overwhelm it. A text overlay highlighting a key term reinforces learning. A diagram illustrating a complex process improves understanding. Too many visuals can be distracting, so use them strategically.
Transitions, Music, and Sound Effects: The Subtle Enhancers
Transitions, background music, and sound effects enhance the learning experience when used thoughtfully. Smooth transitions create a natural flow between scenes. Appropriate music sets the tone and keeps viewers engaged. Sound effects highlight key actions or draw attention to details. Avoid overusing these elements; the learning content should always be the focus.
Creating a Consistent Visual Identity
For a series of training videos, maintain a consistent visual identity. Use similar fonts, colors, and graphics throughout. This creates a professional, unified look that reinforces your brand and helps viewers connect with your content.
Accessibility Considerations: Expanding Your Reach
Accessibility is important. Include closed captions for viewers who are deaf or hard of hearing. Provide transcripts for those who prefer to read. These steps expand your audience and demonstrate a commitment to inclusive learning, ensuring everyone benefits.
By focusing on these editing principles, you can transform raw footage into compelling training videos that maximize learning impact and improve knowledge retention. This meticulous approach ensures your videos are professional and effectively communicate information, empowering your audience.
AI Tools Transforming Training Video Creation
Artificial intelligence is rapidly changing how we create training videos. From generating scripts and automating edits to synthesizing voices, AI tools offer many possibilities for improving learning. This makes creating engaging and effective videos much more efficient and accessible. Let's explore some practical ways AI can elevate training video content.
AI-Powered Scriptwriting: Faster Content Development
Writing a script is often the most time-consuming part of video creation. AI-powered scriptwriting tools like Jasper can significantly speed up the process. These tools can outline the script, suggest dialogue, and even adapt content to different learning styles. This allows instructional designers to focus on the important teaching aspects of the training, ensuring the content remains engaging and effective. Remember, AI should enhance the creative process, not replace the human element entirely. For further insights on effective content creation, check out this article on writing good bug reports.
Voice Synthesis: Professional Narration Made Easy
Traditionally, high-quality narration could be expensive and complicated to produce. AI-driven voice synthesis tools like Murf.ai offer a cost-effective solution. These tools can generate realistic voices in many languages, removing the need for expensive recording studios and voice actors. Plus, updates and revisions to the audio become much easier, simplifying the editing process.
AI-Driven Editing: Automating Tedious Tasks
Video editing is another area transformed by AI. AI-powered platforms like Pictory AI can automate tedious tasks. These might include things like smooth scene transitions, automatic caption generation, and even basic video editing functions. Imagine a tool that automatically removes awkward pauses or adds relevant visuals based on your script. This drastically cuts down on production time. It lets instructional designers focus more on the learning experience and less on the technical details. For accessible training videos, consider compressing your videos, as discussed in this article on how to compress videos. By March 2025, 77% of educational institutions are projected to use AI-generated training videos, with a 40% improvement in learning outcomes due to personalized content and adaptive pacing. AI tools can automate key production aspects, cutting timelines by up to 50%. For more information, explore AI video creation statistics. This trend demonstrates the growing shift towards scalable, data-driven video production.
Here's a quick look at some popular AI tools for various stages of training video production:
To help illustrate this, here's a table summarizing some useful AI tools:
AI Tools for Training Video Production
This table summarizes the most effective AI tools for different stages of the training video creation process.
| Production Stage | AI Tool Type | Key Features | Best Use Cases |
|---|---|---|---|
| Scriptwriting | AI Script Generator | Script outlining, dialogue suggestions, content adaptation | Generating initial drafts, overcoming writer's block, tailoring content |
| Voiceover | AI Voice Synthesizer | Natural-sounding voices, multiple languages, easy revisions | Creating narration, producing explainer videos, localizing content |
| Video Editing | AI Video Editor | Automated editing, scene transitions, caption generation | Cutting production time, enhancing visual appeal, improving accessibility |
This table provides a brief overview of how AI tools can be integrated into different production stages. Choosing the right tool depends on the specific needs of your project.
Ethical Considerations and Human Oversight
While the benefits of AI are clear, it's crucial to consider the ethical implications. Maintaining human oversight is essential to ensure that technology supports, not replaces, human creativity and judgment. AI tools should be used responsibly, carefully considering bias, accuracy, and the overall learning experience. This thoughtful approach will ensure training videos remain engaging, effective, and focused on human learning.
From Creation to Results: Distribution That Drives Learning
Creating great training videos is only the first step. The real objective is getting those videos to your audience and making sure they actually learn something. This requires a strategic approach to hosting, sharing, and promoting your training content. Think of it like a product launch—even the best products need a solid distribution plan to succeed.
Choosing the Right Hosting Platform
The ideal platform depends on your audience and the training's purpose. For internal training, a learning management system (LMS) or a company knowledge base are excellent choices. These platforms offer secure access and allow you to track employee progress. For videos aimed at customers, platforms like YouTube or Vimeo provide wide reach and easy sharing options.
Many platforms now use AI to simplify video creation. You can explore this further in the ultimate guide to AI video creation platforms.
Optimizing for Different Platforms
Every platform has its own unique characteristics. On YouTube, using relevant keywords in your title and description is essential for searchability. Within an LMS, organizing your videos into modules and incorporating quizzes can boost learner engagement. Optimizing for each platform helps your videos reach the right people and provide the best learning experience.
Structuring Content for Modular Reuse
Creating modular content, which means breaking down videos into smaller, reusable sections, maximizes your investment. Imagine building with LEGOs – you can combine different blocks to build all kinds of structures. Similarly, modular video content can be repurposed for different training programs. A short video explaining a specific software feature, for instance, could be used for onboarding, ongoing training, and even customer support. This saves time and money while maintaining consistency.
Measuring Learning Outcomes: Beyond View Counts
Simply tracking views isn’t enough. True success lies in learners absorbing and applying the information. To measure real impact, you need to dig deeper. Track quiz scores, gather learner feedback through surveys, and even monitor on-the-job performance changes. These metrics provide valuable insights into whether your videos are achieving their learning objectives. For example, if viewers drop off at a certain point, it might indicate a confusing section. This feedback helps you pinpoint areas for improvement.
Gathering Feedback and Iterative Improvement
Learning is a continuous process. Regularly collect feedback from your viewers. Use surveys, polls, or even informal conversations to understand what's working and what isn't. This feedback loop fuels ongoing improvement. Update your videos based on this feedback to ensure they stay relevant and effective. This iterative approach keeps content fresh and aligned with your organization’s changing needs. By constantly refining your training videos, you can ensure they remain valuable tools for driving learning outcomes.
Looking to streamline customer support with video? Screendesk offers integrated screen recording, live video calls, and secure video sharing to enhance customer satisfaction and boost your support team’s efficiency.